Hi All!
A bit of an update on the mods for Over Easy!
While our cruising plans for the summer have been disrupted to some extent we haven’t been idle.
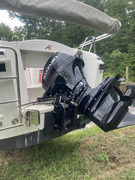
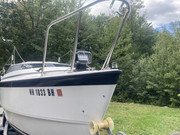
NEW ENGINE
The new Suzuki DF60AV engine installation has been GREAT,


We’ve completed our first 20 hour break-in and just got our first oil change completed with ZERO issues.
We noticed that we were not getting to full rated RPMs with a 9 pitch prop which is the lowest stock prop that fits our engine.
We asked our dealer to have a 9 modified by a respected prop shop to bring up the RPMs by about 500 RPM.
At the oil change we swapped the prop and tested it on the water ….. the results were a bit disappointing in that the automatic engine rev limited kicked in with a little bit more throttle range still available

… by rough estimates the modified prop seems to be equivalent to a 7 pitch …. after some considerations we decided to go back to the 9 pitch stock prop and the 7 pitch is a spare prop should it ever be necessary on our future journeys…. it was something we had been considering as part of our preparations anyway.
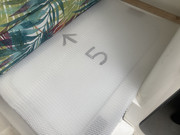
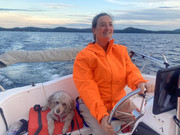
The 9 pitch gets us to 5500 rpm and 15 knots with empty ballast and 14 knots with full ballast.
Both conditions allow us to get up on plane at full throttle.
The perspective view with empty ballast requires standing at the helm to get a clear view over the bow.
The perspective view with full ballast allows one to sit at the helm to get a clear view over the bow.
I’m sure that our internal balancing could easily bring the bow down as I know that we are currently loaded slightly aft.
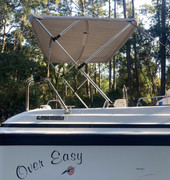
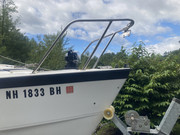
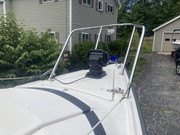
 EXTENDED HEIGHT BIMINI
We Extended our Bimini height to allow a 6’1” adult to stand upright and move about without having to duck or crouch
This is something that we have really been enjoying
We did this by making a pair of extensions to the side tubes and sleeping the joints.
We posted this in the MODS section earlier.
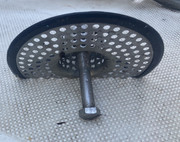
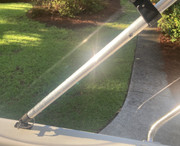 ENGINE WELL DRAIN SCREEN
We made a nice debris screen for the engine well drain to keep the crud and acorns from wandering down and jamming the drain line.
Our drain line has a pair of right angle fittings (I assume are factory original) that LOVE to collect things and plug up.
Down South we have Live Oaks with small marble sized acorns that drop into the well which roll nicely into an unprotected drain clogging it up rather nicely (along with long needle pine straw that makes a mat on top)


.
We took a sheet metal SST sink drain screen and modified it with a bend and a weighted pilot bolt that keeps it in place.
The drain screen ‘basket’ is pointed up to ensure that water will still go down the drain even with some debris present.
We have previously added this to the MODS section.
This MOD has put an end to that pesky problem of a clogged and jammed drain

.

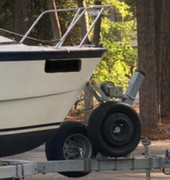
 VAN FULL DIAMETER SPARE TIRE CARRIER
When we purchased our Caravan back in 2017 we insisted on getting a full diameter spare tire to go along with it.
The van came standard with a fancy air pump and an integral can of fix-a-flat but we weren’t impressed.
The next option was a small diameter spare tire that would fit into the central under deck recess area which would require lowering down, uncoupling it from underneath the van and sliding it out. Now if a tire was flat this would ne nigh to impossible without first getting the van up on a Jack….. I for one am never ever going to go under ANY VEHICLE while it is solely supported on ANY CAR JACK!!! As a former Ambulance Medic I’ve personally seen the horrific consequences of a vehicle slipping off a Jack !!

.
The other aspect of the small diameter spare is as the Caravan is front wheel drive one would also make sure that under normal (non-towing) conditions one needs to put the small diameter spare on one of the rear positions to avoid damaging the front wheel drive system. This is NOT a viable option when towing as the small diameter spare is in no way rated to carry that kind of load.
So that brings us to why we chose to insist on the full diameter spare even though it rides inside when we travel, especially when towing.
We decided to take advantage of the unused space of our boat trailer winch post and mounted a spare tire carrier on it! This allows us to open up interior space in the van while still keeping our full diameter spare with us and readily safely accessible when traveling cross country with Over Easy.
We’ve yet to post this in the MODS section but will shortly.
Well worth the effort!
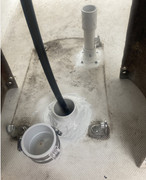
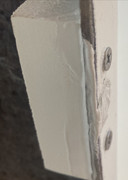
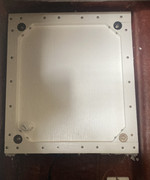
 IMPROVED UNDER PEDESTAL DECK FEED THROUGHS
In preparation for the new engine controls and instrumentation we decided to make some improvements to the deck feed throughs under the pedestal.
The small feed thorough tube forward was pretty much flush with the top deck surface and didn’t protrude through the aft berth ceiling. It also wasn’t very well sealed to the top deck and wasn’t sealed at all to the aft berth ceiling. This had allowed water from the cockpit deck to occasional migrate into the tube and into the space between the cockpit top deck and the aft berth ceiling.
The larger aft feed through was only slightly better in protrusion above the deck. It appeared that at some time in the past silicone sealant had been applied but it never actually bonded to the deck surface as it half peeled away. There was no protrusion through the aft berth ceiling or sealant. So again water had occasionally migrated into the aft berth and the interspace.
After removing what was of any prior sealant and throughly cleaning and scuffing the surfaces new ShEdule 40 PVC pipe feed through tubes were installed. I chose to use a splice collar as a top side penetration stop to help stabilize the feed throughs. The interface areas top and bottom were throughly wetted with 5200 and allowed to set for 72 hours in warm weather (80 +F) before any further handling to help ensure they sealed top and bottom. I then added extensions of about 4+ inches to ensure there would be little possibility of water being able to get into them to the aft berth or interspace.
This should help get rid of the pesky occasional wetness observed in the aft berth and the interspace that appears to migrate into the aft bowl interspace region that a prior owner attempted to address at sometime in the past.
Sorry but at the moment all I have is an in-process picture to share.
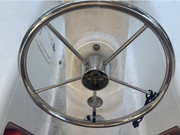
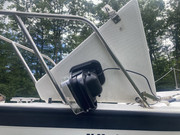
 IMPROVED HELM WHEEL CLEARANCE TO HELM SEAT
While preparing for the new engine controls and instruments on the pedestal we decided to reverse the steering box mounting bracket.
This has been a bit of a problem aspect for us as it crowded the helm seat and caused knees to jam under the helm wheel when seated. It was also somewhat uncomfortable when standing at the helm.
Getting it flipped around was its own challenge as I ended up having to fabricate my own wheel puller to get the wheel separated from the steering shaft. Then there was the awkward bit of nuts & bolts in tight confined spaces which may have resulted in a few “select” words being uttered under my breath.


We fabricated a new cover plate to address the old messy cut out and used the mounting bracket bolts and 5200 to secure it in place
MUCH MUCH NICER AND WORTH THE EFFORTS
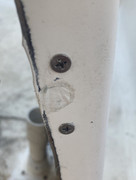
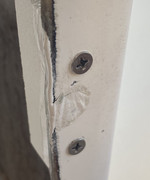
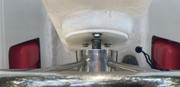 PEDESTAL SIDE COVER MOUNT SCREW IMPROVEMENT
The rubber Wellnuts that we installed previously didn’t work out so well…or as anticipated.
The original pedestal holes that the panel screws went into had become stripped over time.
We then had drilled out the pedestal holes to accept rubber bodied brass threaded Wellnuts snuggly and we applied some 5200 to bond them in place. Well when we went to remove the screws to access the interior of the pedestal in preparation for the new engine controls and instrumentation they wouldn’t allow the screws to come out!
That was a bad thing as I couldn’t access the interior of the pedestal at all!
Eventually I was able to carefully and incrementally and gently pry the covers off the pedestal. Whew! That was a close one.
Turns out the brass threads of the Wellnuts bound up to the SST machine screws.
So that didn’t work… time for another approach.
I added blocks of PVC board at each location inside the pedestal and secured them with two SST CS screws and 5200.
This allows the panel screws to fully engage in a good long lasting in-depth surface.
Well worth the effort!
 NEW ENGINE CONTROLS AND INSTRUMENTATION
As part of getting our new engine we also go new instrumentation and controls to go with it.
While we had the engine dealer do the installation for warranty purposes we did make the layout and component selection.
We chose to us a low profile side mount throttle and shift lever with integral trim switch that has the bulky control box inside the pedestal. This make maneuvering around the tight confines of the cockpit/pedestal significantly easier than the old side bolted box we had before
We had the Tachometer and engine condition gauge mounted above the helm wheel which necessitated the fabrication of a 1-1/2 inch thick Starboard collar with a nice smooth radiused edge. It’s at a great location and angle to see while seated or standing at the helm
A significant improvement over the prior arrangement where the tach had been located below the helm (which would have been nice if one had eyes in one’s kneecaps

).
Below the helm wheel we had the Hobbs Meter and Trim Position Indicator installed.
The new Hobbs meter will help us keep track of engine operational time so we can plan our annual and preventative maintenance aspects appropriately.
The Trim Indicator is along side it to provide us with accurate ‘at a glance’ confirmation of engine position without turning around while underway.
Below these we had a cover plate made to mount the engine ignition and safety lanyard switch mounted.
This was the best easily accessed location (even though one does have to be aware of the location to avoid inadvertently bumping it and possibly turning the engine off.
All-in-All we really like how things turned out
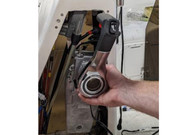
Below is a photo of the control box showing the limited space within the pedestal.
(More photos to follow)
 NEW & IMPROVED THROUGH THE HULL SONAR BOX
We took the opportunity to improve our through the hull sonar.
The original first attempt at one side limited some of the features of our transducer so we enlarged it and went to liquid saturated foam.
This should work out nicely.
Unfortunately our sonar transducer seems to have kicked the bucket!
We’re currently talking with the manufacturer to get a replacement unit in and test it.
Meanwhile we’ve mounted a smaller chartplotter/sonar unit for our still planned trip to Lake Champlain at the end of September and early October. To make this work expeditiously we chose to mount this smaller transducer to the ballast tank fill valve housing.
This has been tested on Lake Winnipesaukee and has worked well. This isn’t gonna be permanent though as I’m very concerned having it protrude below the hull and sticks out from the stern. When traveling we will be folding it up or removing it to avoid potential damage.
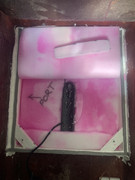
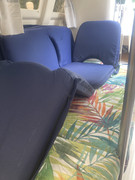
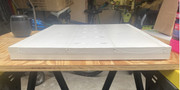 NEW INTERIOR CUSHIONS AND UPHOLSTERY INSTALLED
WE FINALLY installed our new 6” thick conformal foam pads!
We decided to leave the dinette table down to make things more comfortable while staying aboard and over nightingale in Over Easy.
We made a new simple bow berth extension to lengthen that berth as well. The prior one worked but wasn’t as sturdy as we’d like.
Three foam sections make up the dinette berth and two make up the bow berth.
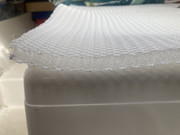
We wrapped the individual foam sections and quilting inside plastic to keep any potential moisture from ever saturating the foam.
For our cover fabric we chose to use an alternative to Sunbrella called SOLARIUM ( available from JoAnn Fabrics) in a tropical themed pattern we find refreshing and contemporary (compared to the bland vintage original RV themed covers that were provided by the factory).
It works for us!

We chose to utilize a safety pinned “no-sew” approach for our covers and top quilting padding over the foam.
Under the new cushions we placed matching sections of Tochta 1/2” thick Air Gap Moisture Pads to ensure that they stay dry from any condensation that may accumulate. We will be adding hull side sections once additional material arrives (shortly

).
We have nice adjustable cockpit seat cushions that double as back rested seats when inside the cabin.
They also allow us to have an adjustable recliner (after a fashion) that I find fairly comfortable
We think this has worked ou VERY NICELY


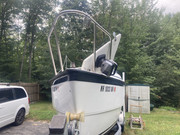
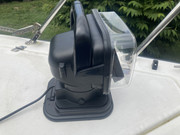
 NEW REMOTE CONTROL BOW SEARCH LIGHT INSTALLED ON ANCHOR LOCKER HATCH
While we like and use our Q-Beam hand held search light it is sometimes awkward to manage it and the helm at the same time at night.
Fortunately we’ve only had to do this only about a dozen times so far and in calm conditions… that may not always be the case though in the future…
So we shopped around for an affordable durable easily removable (who needs a searchlight in daylight cluttering up the deck space) and remotely controlled LED high intensity search light.
We looked at several on-line and decided upon this one with a removable base for about $100.
We positioned it so that the anchor locker hatch can be easily opened and closed with & without the searchlight in place.
We positioned it on the anchor locker hatch to get it as far forward to minimize any back scatter which interferes with one’s night vision.
To install the searchlight while underway one opens the forward hatch and then slides the searchlight into the self locking fixed base.
The remote control allows us to sweep the area ahead via a wireless fob that can be secured to the pedestal or lifejacket as desired.
The unit simply plugs into a standard 12 VDC socket.
It works nicely and is easy to use.
A nice MOD that we we be adding to the MOD section shortly.

We just wanted to share some of what we’ve been up to the past couple of weeks.
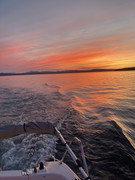
We’ve also been out and about on Lake Winnipesaukee several times since getting our new engine enjoying the beautiful lake and surrounding scenery.

Next we are still planning on getting over to Lake Champlain for the last week of September and first two weeks of October.
Best Regards to All
Over Easy


 !
! YIPPIE

 .
. ).
).
 )
)  , etc.) as well as relevant contour (such as where one is actually positioned in the actual channel which may be significantly different than what a chart might show) to each side. A typical depth transducer is basically a cone straight down of 15 degrees that gets averaged to provide a single data plum line indication. This is great for knowing the depth immediately below but lacks detail and resolution.
  …. motoring would be the preferred option for us🫡.
 and doing… like moving the bow nav lights… a protective cover to avoid furler sail/line snags… reinforcing to take the winch loads… maybe relocating things a bit

 was going to be around 6:30 ish and our arrival back would be in the dark.


 Smooth launch, new and improved power, and having fine Caribbean food in Vermont. You could just sit back and imagine hearing steel drums.