Thank you for your comments, interest and appreciation of our efforts!

Getting this year’s preparations accomplished in the past two months has been an enjoyable experience that has challenged us and tested our logistical skills (as well as our memory as to what the heck was we doing there vs. where did we think we wanted to go vs. where are we ending up

).
Working through the sequence of needing to do this first, so that can do done next, revising plans due to the way things actually are vs. what they were thought to be, and pondering the original design intent to ensure that it isn’t compromised has been fun!
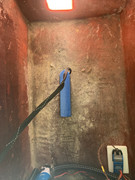
All the modifications we have made have continued to allow the hull to flex by utilizing a distributed pad and glide support approach. With the galley in particular it rests on a 1/4” layer of reinforcement resin and chopped strand on top of the port ballast transfer tube which supports a PVC wedge to provide a level surface for the front of the galley which is free to glide fore/aft and laterally. That way we aren’t applying a direct load on the original transfer tube.
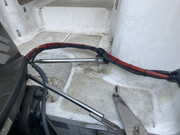
At the back of the galley we made four 1-1/2” diameter wide flared posts of reinforcement resin and chopped strand bonded to the sloping curvature of the hull to provide a place to support a 1-12 x 3/4 section of PVC (fore/aft direction) that basically rests in a U channel on the top of the posts. A second wedge of PVC board does the leveling fore/aft and laterally which rests on the first. The back portion of the galley structure is attached to this wedge portion which is free to slide fore/aft and laterally on the PVC board resting in the top of the U channels of the posts. This should allow the relatively thin hull to flex pretty much however it needs to (as originally designed) without a concentrated load or artificial constraints.
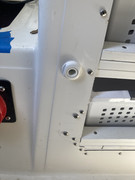
The galley support structure ties into the pre-existing galley fiberglass shell at the front face perimeter cutout with SST pan head screws. These all have been predrilled through the galley fiberglass to allow for some differential thermal expansion/contraction between the PVC and Fiberglass. This also seals up the top flange to the base of the top box extension so nothing can wander out. The top riser box is bolted through the PVC board edge into the top of the preexisting galley fiberglass as a separate entity to avoid placing any unwanted rigidity to hull contact.
We are happy with the end results functionally, aesthetically, operationally and structurally.
The clear finished Maple split top adds a bit of clean warmth in a Scandinavian sort of way. (We are already considering what we can do aesthetically with the dinette seat backs (which are some sort of veneered MDF) and table top (which is fiberglass) that is functional but somewhat awkward. Those projects will have to wait for now

.)
For a sink we are using a rectangular plastic tub that stores away inside the seat adjacent to the galley. This is where we plan on also keeping our fresh water containers. There is a small 5 gallon separate grey water container that for now we haven’t decided upon a permanent location as yet.
We laughed at the image of actually washing down the interior with a fire hose and using the bilge pumps to empty!
That would have been one way to clean up after a party or extended trip that we hadn’t previously considered!!
We think that MacGregor’s original intent with having a fiberglass interior was to standardize production process and to provide an interior that was a simple wipe down to clean with soap and water. Little to no woodworking to make or maintain for virtually the life of the vessel. He thought about all the things that could go wrong, like a companionway hatch left open in a rainstorm or forward hatch open in a broach. In a Mac such an occurrence is an annoyance whereas in a vessel with a finished wood interior it would be a disaster and major disappointment. (Wringing out a couple of cushions and the use of a Wet-Vac is a whole lot nicer recovery than dealing with soggy woodwork and ruined finishes.) in the worst case of say having a rain leak from a chainplate or window seam where the moisture sit inside a closed warm cabin and things get mildewed of moldy one could actually consider taking a pressure washer to the interior to clean it up if one were so inclined.
We think this is one of the reasons there are so many Macs still being happily sailed decades after manufacture and by subsequent new generations of sailors. It is a clean, neat and functional design we all enjoy using and maintaining.
Our plans are to eventually travel the Atlantic Intra-Coastal Waterways to the North and South. Not all at once but gradually as we become more familiar and proficient with sailing/motoring Over Easy. In time we might go as far NORTH AS Nova Scotia and South to Key West. If we ever get REALLY good at this maybe to the BAHAMAS....with really nice weather and an half dozen other buddy boats. “The LOOP” is another long shot possibility? Up the Hudson River to Lake Champlain? The St. Lawrence Seaway? The Great Lakes? The Gulf Coast? The West Coast of California to Washington?
These are all nice things for us to dream about and ponder as our Mac26X opens up these possibilities with it being small enough and yet large enough to do these potential adventures in comfort and safely. Being trailerable is one of the most endearing features to us.
From a practical perspective we will “start” slowly, learn as we go along, enjoy the journey process and projects as much as the destinations.