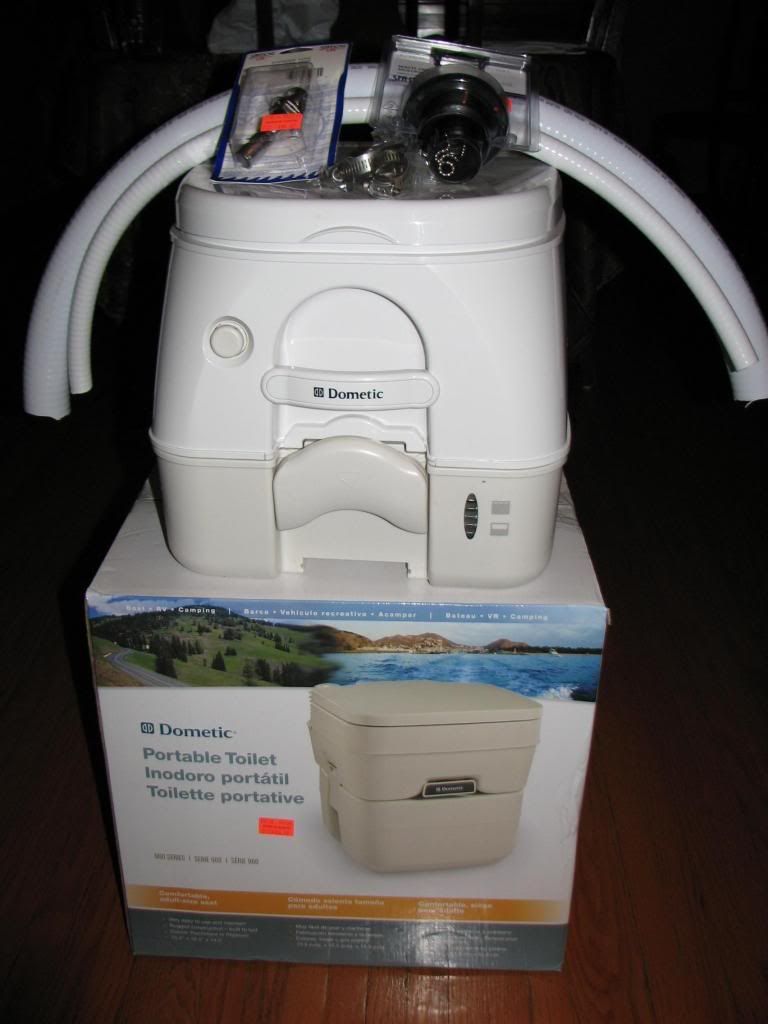
I'm not posting this because I'm a $hit disturber but certain revelations of late made me realize it was futile to keep avoiding the very real possibility of a substantial fine while sailing the sunny waters of Ontario, Canada. Our acquisition ran up the nasty sum of $250 for a Dometic brand pump-out head which replaced our hastily purchased Dometic carry out model, when we got our 'M' in 2010. However, as we've been told, this avoids the possibility of potentially getting saddled with a $12,000 fine for doing the sequel to 'Minority Report' where we might even begin to 'think' about manually dumping our do-do overboard! Enough said - I'm too old to fight city hall with anything but my middle finger, so here's a small run down if you're contemplating doing a similar capitulation for this side of the border:
First, I will point out that my pics exclusively cover an

model. As I understand it, the

is a completely different model layout wise, so if you are sailing in that direction you will definitely want to get some better advice, or insight, before banging holes in your boat!
Here's the old dumpster sitting on top of the new replacement:
http://i1121.photobucket.com/albums/l52 ... 5a61bc.jpg
Our chandlery - Dowsar Marine, in Hamilton, Ontario has done this many times before (on both models) and were pretty much right-on in pre-cutting the sanitation grade hosing for the installation. Perhaps another inch or two with the big pipe might have aided - but it still worked out satisfactorily. They even went so far as to ask which year our
was, as there were minor variances within the model line. If you can't get this level of advice, be very certain with your measurements and observations before you start mucking about with the hole cutters.
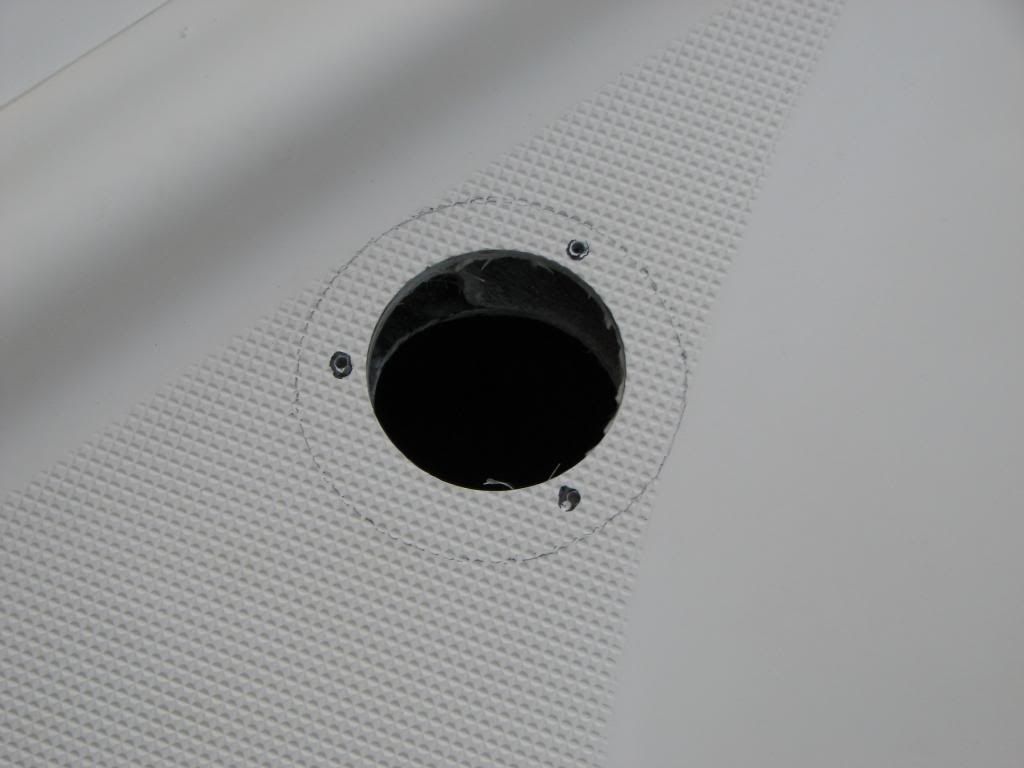
Here's the main hole up on deck:
http://i1121.photobucket.com/albums/l52 ... 6cd3ad.jpg
http://i1121.photobucket.com/albums/l52 ... 3b8343.jpg
For the
(only) it involved inverting the fitting and marking the topmost flange in-line with the edges of the deck anti-slip pattern, then finding the center of that and choosing a hole saw of the
exact size of the widest part of the particular fitting you've picked. Ours was made of Nylon and would have been different if we'd chosen the more expensive Stainless steel. I kind of think it goes with the Racoon stripes.
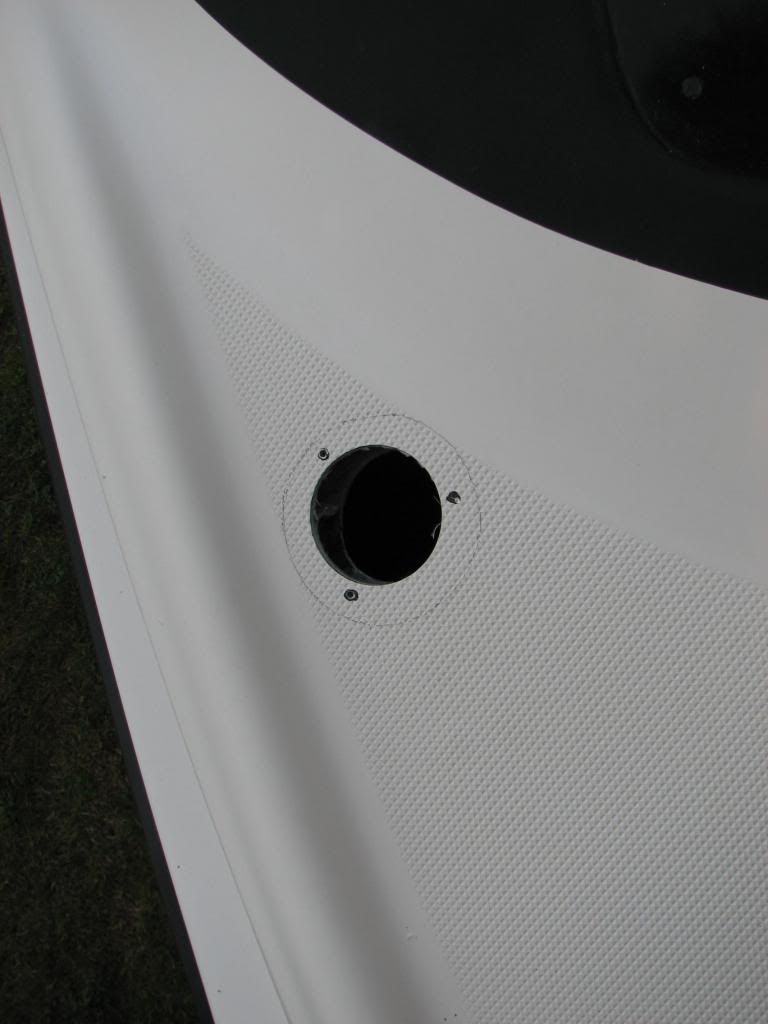
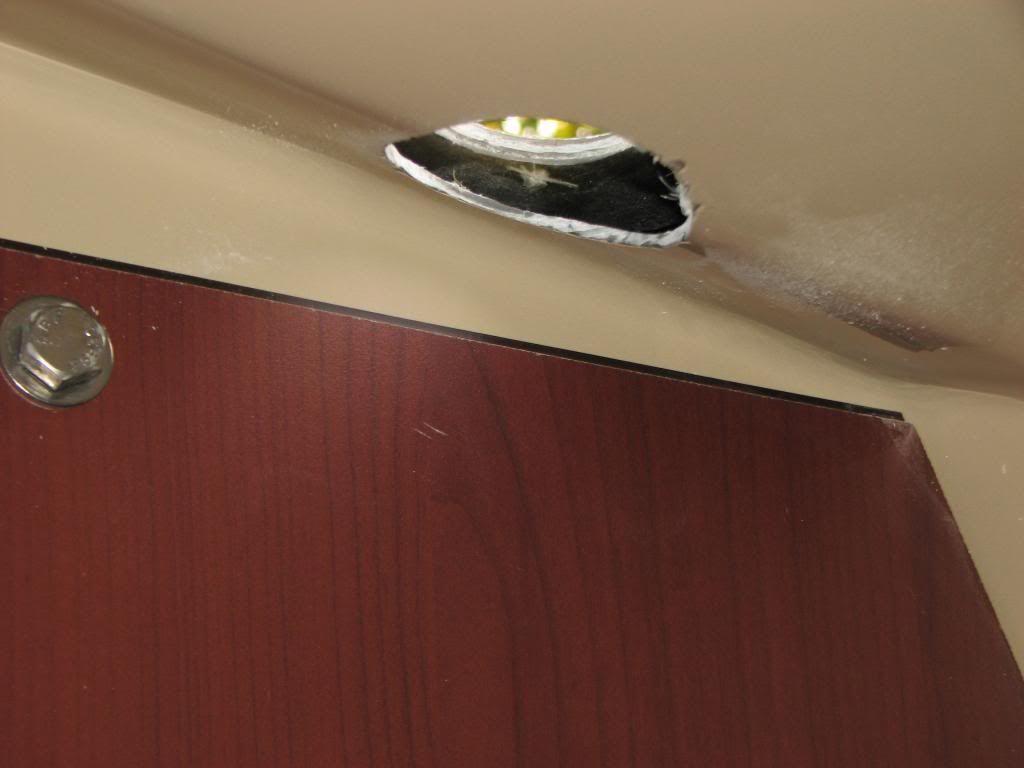
Here's the installed fitting, and where the hole exited inside. Note! No room for error, and it came through a section of the interior liner with a curve in it:
http://i1121.photobucket.com/albums/l52 ... 144cfd.jpg
http://i1121.photobucket.com/albums/l52 ... 1240c5.jpg
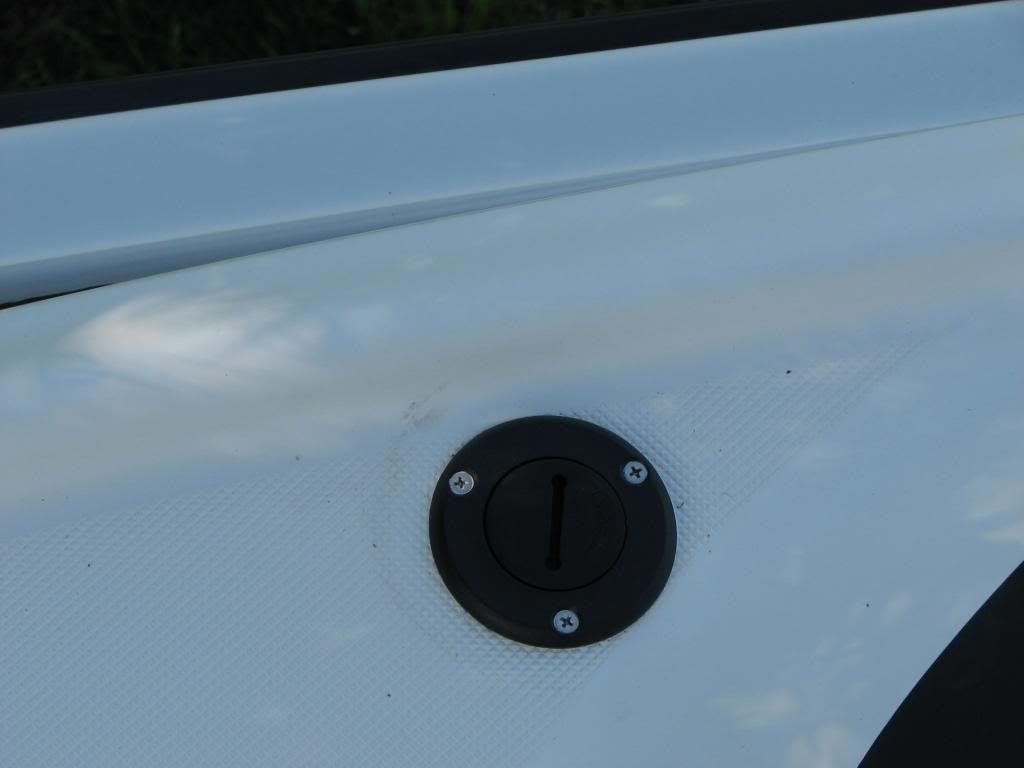
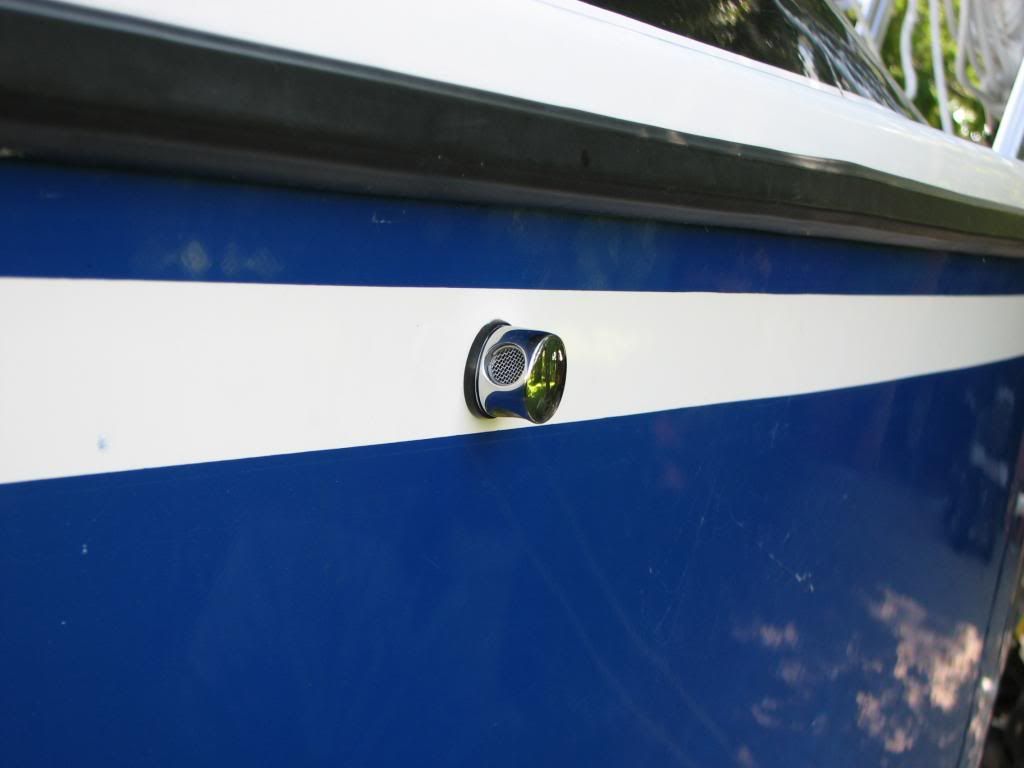
Next came the outside vent. We were told very specifically to orient the fittings hole(s) rearward, if we were to avoid the dreaded filled potty-while -heeling-syndrome!

As you can see, it came out just below the interior liner. This was measured exactly 50 1/2" (sorry, no metrics) from the front edge of the chainplate forward towards the bow, and in the center of the white detail stripe. The drill caught on the adhered carpeting somewhat - but that was easily cleared up with an exacto knife afterwards:
http://i1121.photobucket.com/albums/l52 ... 32b333.jpg
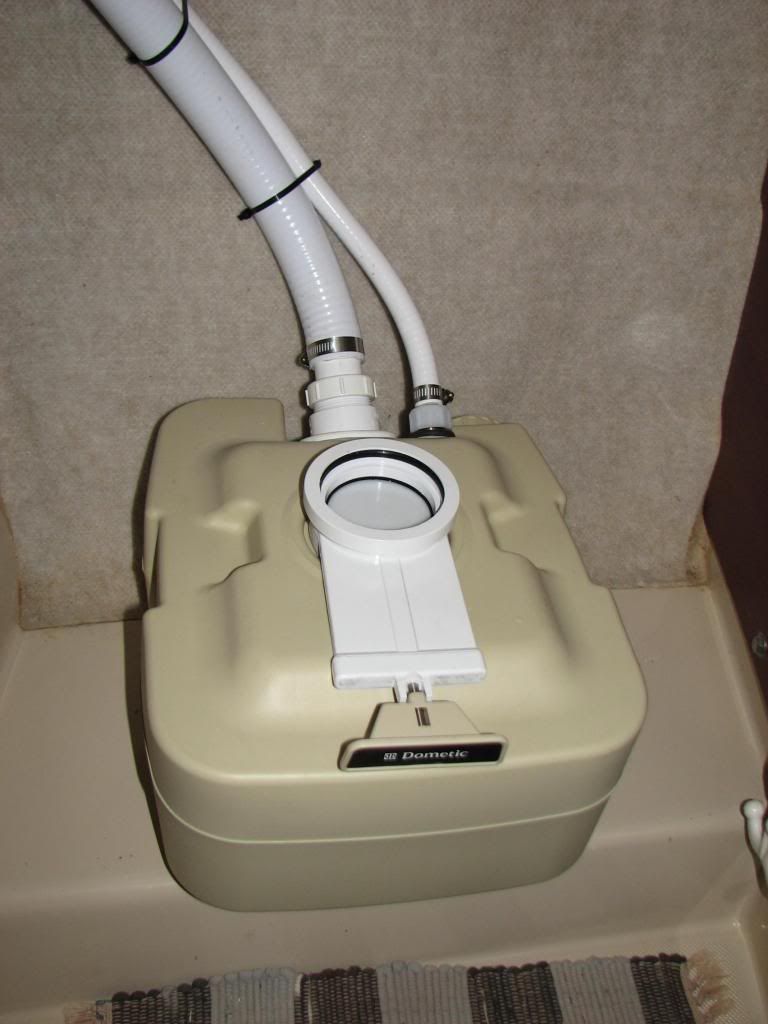
Here's the supplied tubing connected with SS clamps. I used a hair dryer, as advised, to sufficiently soften the thick tubing so I could insert the fittings:
http://i1121.photobucket.com/albums/l52 ... 50c80a.jpg
http://i1121.photobucket.com/albums/l52 ... 91e3ca.jpg
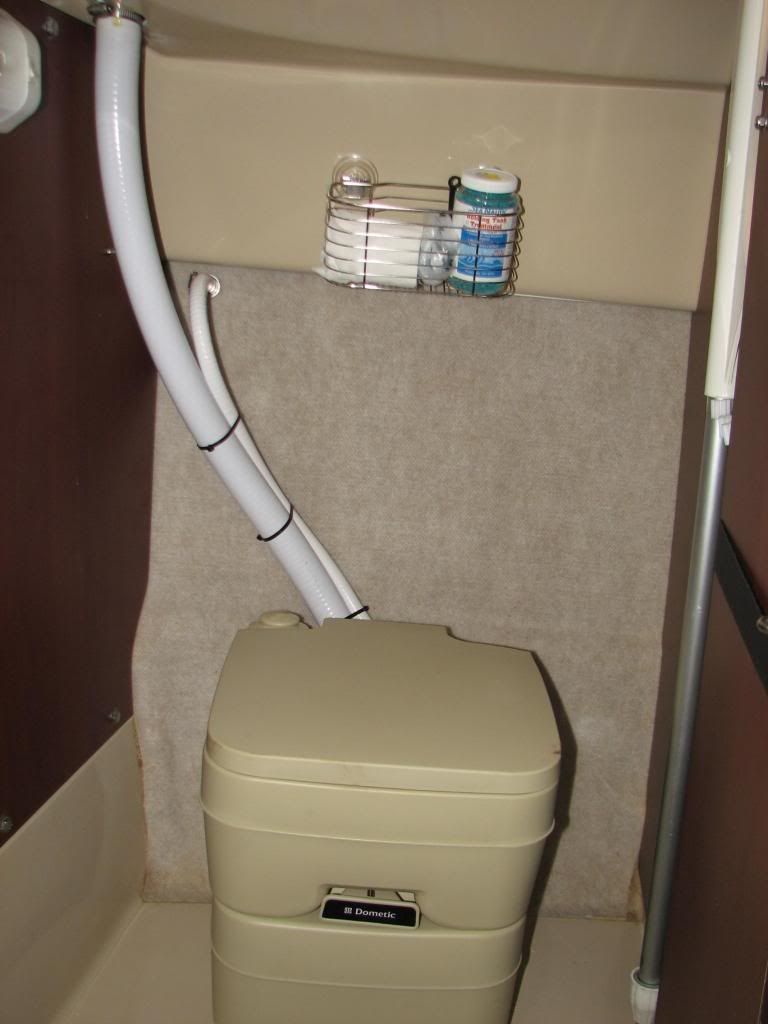
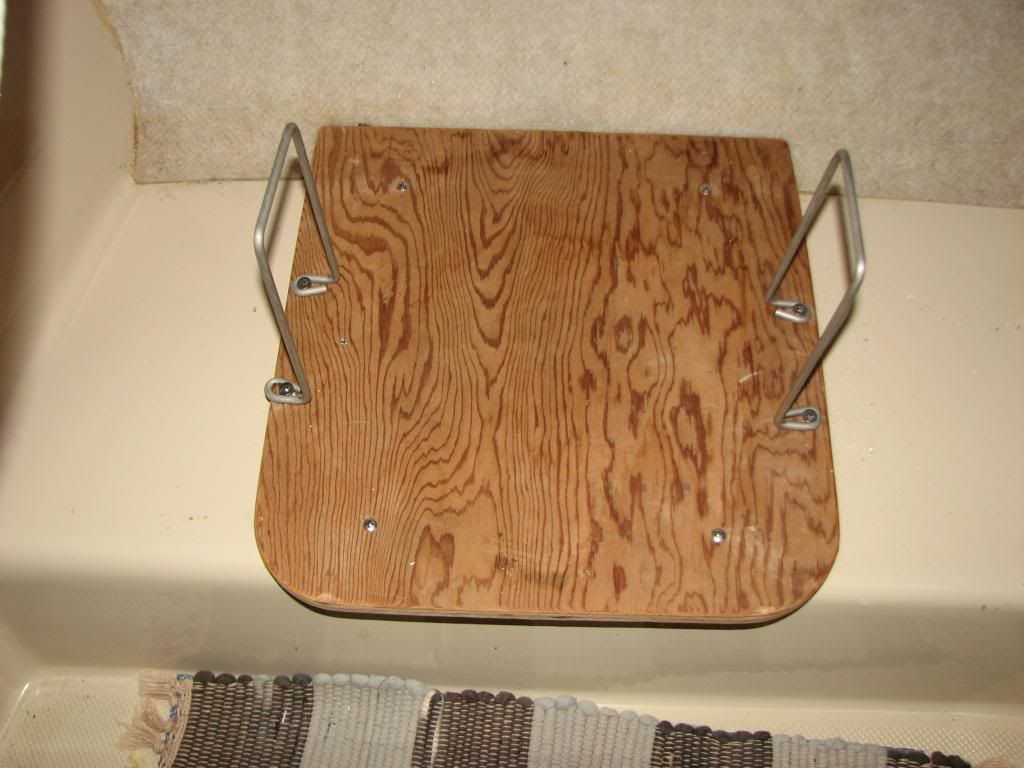
I was able to use the plywood base I had earlier fabricated, for our previous non-pumpout model. The reason for this was because the floor ledge in the
didn't quite provide enough support to get entirely under the front little feet of this model commode. Quite simple to do and attach with SS screws. (Make sure the hole you pre-drill into the fiberglass is sized right for the screw hardware you choose - topsides included, otherwise the gelcoat will spall.) Luckily, the base footprint was almost identical in my case:
http://i1121.photobucket.com/albums/l52 ... ed1976.jpg
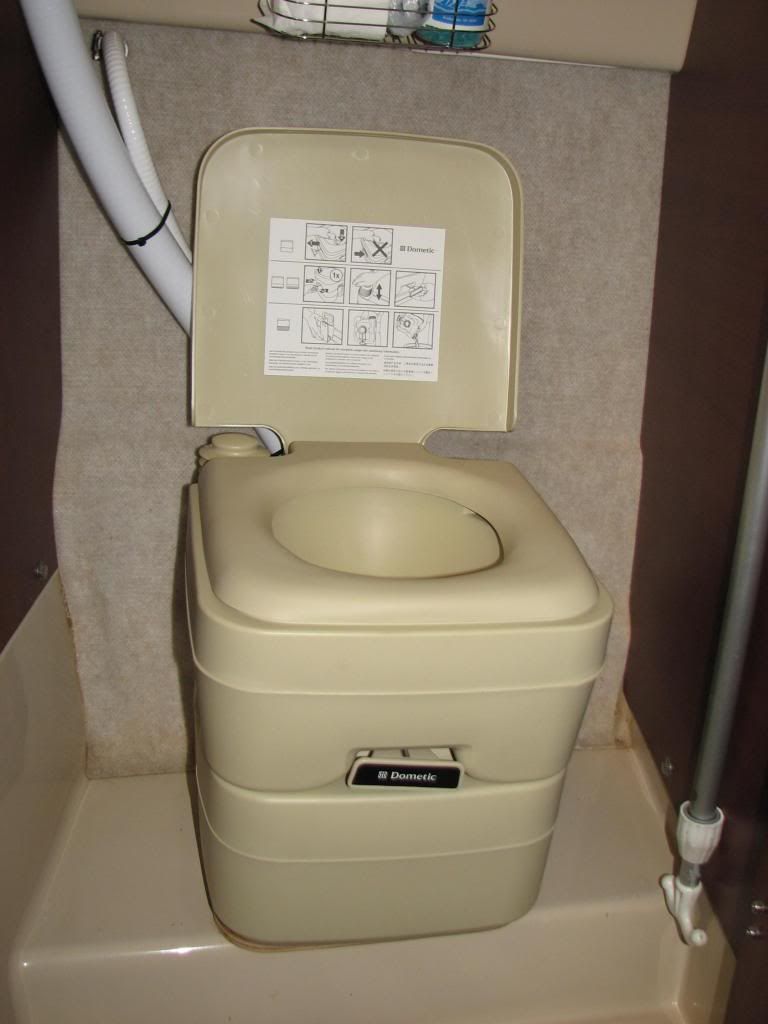
And here's the finished installation!
http://i1121.photobucket.com/albums/l52 ... 2e2070.jpg
Yes, we now have to pay for pump-out, but could still disconnect the connections and cap the openings with the supplied hardware - if we wished - then manually carry it to an emptying location, provided we were crazy or desperate enough. This model probably has more than twice the capacity of the once it replaced, and I wouldn't like to be dropping that one inside the cabin - like I once did with my last. I think I could now make about two weeks out before beginning to panic!
A further note about making holes. You will generate an inordinate amount of talcum-like dust that goes everywhere! Don't breathe it and have a running vacuum nearby to cut down on the amount left behind. I purpose bought a deep circular hole cutter that centered on a mandrel bit - about $7 I think. It took a couple of runs through top - interior - and a middle layer, including some foam - clearing the tool frequently, before I broke through. Stuff will get hot, so don't rush it!
Now I can sleep at night...

Ross


