Page 1 of 2
Complete Raymarine System Installation into a 2010 26M
Posted: Tue Jun 14, 2016 2:17 am
by kcmj
Hi All
I am new to this web site and have just purchased my 2010 Macgregor 26M in Perth Western Australia. Picked her up last week end and feel I am finally following the dream. The boat is in immaculate condition like it has just rolled off the production line so it has not been altered in any way as yet. I like this as I can set it up exactly how I want it and I have seen some great stuff on this forum. I have just bought all the navionics for the boat and chose to go with a Raymarine SeaTalkng system. This includes the Multi Function Display (MFD). This will be the a98 9". The EV-100 Evolution Auto Pilot. The Ray 60 VHF radio. Through the hull CPT-110 Transponder with CHIRP. The i70 Multi Function Instrument. Wind Vang.
I plan to document my progress on this blog so people can use it as an information based step by step progress from an non-professional installers point of view.
So lets get started.
Where to put all the stuff. I plan to flush mount the MFD into the flotation bulk head to the left at top of the dagger board shoot. The VHF radio will also be flush mounted here. The EV-100 auto pilot sensor will be mounted in the storage compartment next to the dagger board shoot down below. The ACU-100 Auto pilot controller will be mounted onto the inside of the transom. I have a number of plans for the i70 screen and the P70 auto pilot control as far as mounting but still not sure. Last of all we have the Wind Vang transducer which will have to interface with the a98 via the ETC 5 analog to digital converter which converts analog transducer signals to something the SeaTalkng can understand. I think this will all Wind,Depth and Speed transducers.
Stay tuned

Re: Complete Raymarine System Installation into a 2010 26M
Posted: Wed Jul 06, 2016 2:38 am
by whyguruguru
This is very cool, I am doing the same modification on my 26x
Please let me know if you have any problem when mounting the EV-100 Autopilot system, thank you
Re: Complete Raymarine System Installation into a 2010 26M
Posted: Wed Jul 06, 2016 6:06 am
by Flightfollowing
One idea that I like was installing the p70 autopilot head and mfd together on top of the pedestal on a rotatable panel. This allows the helmsman to easily control and interact with the autopilot from either the helm seat as usual, or rotating the whole pedestal top panel to the side or even partially forward so that the helmsman can sit right next to the companionway tucked under the dodger to avoid spray, and still control everything from either position. Works very well. One side benefit is that you don't have to make a permanent cutout for the electronics in a pristine boat, you can change you mind and move the electronics or upgrade them in the future without having to patch a big pair of flush mount holes. Also, if you are spending a bunch of money on the electronics, the lowance fuel totalizer for about $200 is a nice add on for managing fuel and integrates perfectly with the raymarine mfd depending upon how you have your fuel tanks set up and how you use the boat.
Re: Complete Raymarine System Installation into a 2010 26M
Posted: Wed Jul 06, 2016 6:27 am
by March
On an X:
I mounted the compass under the step, right next to the ballast breathing hole. It's covered while under way and more centered than on the side of the centerboard booth. The computer is on the head wall, under the cockpit--out of the way but still easily accessible.
It took us for ever to calibrate the AP. Turned out that the cables that go into the computer were reversed, even though they were supposed to be color-coded (and yes, I triple-checked the colors). Manufacturer's error--the Raymarine was put together in Hungary. Reversed the cables and now it's working just fine.
Will post pics with the "lever" that I installed next to the wheel, on the side of the steering column. Found a stainless steel drawer handle at Menard's, the right length. Came out quite nicely.
Re: Complete Raymarine System Installation into a 2010 26M
Posted: Thu Jul 07, 2016 12:34 pm
by BOAT
Sorry, just getting to this,
Wheel pilot or Tiller pilot????
https://vimeo.com/155678897 <CLICK LINK FOR VIDEO

I can't help on the wheel pilots - they have really long hard over times and are hard to set up. The tiller pilot has a very fast hard over time and is very easy to set up. The main drawback of the tiller pilot is that it limits the rudder swing when engaged. The display probably should be mounted on the pedestal.
For driving the boat from somewhere else on board i think a wireless remote is better and less expensive than installing a second display:
https://vimeo.com/155612681 <CLICK LINK FOR VIDEO

With the remote I can steer the boat even when I am sitting on the head.
Re: Complete Raymarine System Installation into a 2010 26M
Posted: Thu Jul 07, 2016 2:57 pm
by Highlander
If u r thinking of flush mounting electronics inside this bulkhead u should know that it can get extremely hot in there which is not good for them
So I installed four S/S 4" vents in there to ventilate the heat out of there I installed 2 into the mirror above the D/B trunk as exit vents

Installed the other 2 underneath the bulkhead above the front dinette seat as entry vents this allows the heat to flow out as it is now no longer trapped in there , on really hot days it can get extremely hot in there without vents

I discovered how really hot it got in there one hot day I opened up the front panel of my bulkhead to add more wiring for my blue led spreader lights & said to myself this cannot be good for my electronics so install the vents which I had bought to use on my

but never did so it was an even cheaper Mod lol
J

Re: Complete Raymarine System Installation into a 2010 26M
Posted: Thu Jul 07, 2016 11:15 pm
by sailboatmike
If your looking for remotes etc, for auto pilots this is the guy to buy from.
http://www.madmanmarine.com/
He actually designs all his own stuff and sells at about 1/2 the price of the big brands, and the real beauty is he adds new features as requested by the end users.
I have no affiliation with this company, I just know heaps of people that use his stuff and swear by how good it is compared to the "BIG" brands
Re: Complete Raymarine System Installation into a 2010 26M
Posted: Fri Jul 08, 2016 9:02 am
by BOAT
sailboatmike wrote:If your looking for remotes etc, for auto pilots this is the guy to buy from.
http://www.madmanmarine.com/
He actually designs all his own stuff and sells at about 1/2 the price of the big brands, and the real beauty is he adds new features as requested by the end users.
I have no affiliation with this company, I just know heaps of people that use his stuff and swear by how good it is compared to the "BIG" brands
I got the entire remote wireless system from RayMarine for less than 350. I'm pretty sure a new head display is over 400.
Re: Complete Raymarine System Installation into a 2010 26M
Posted: Sat Aug 27, 2016 1:34 am
by kcmj
Hi All
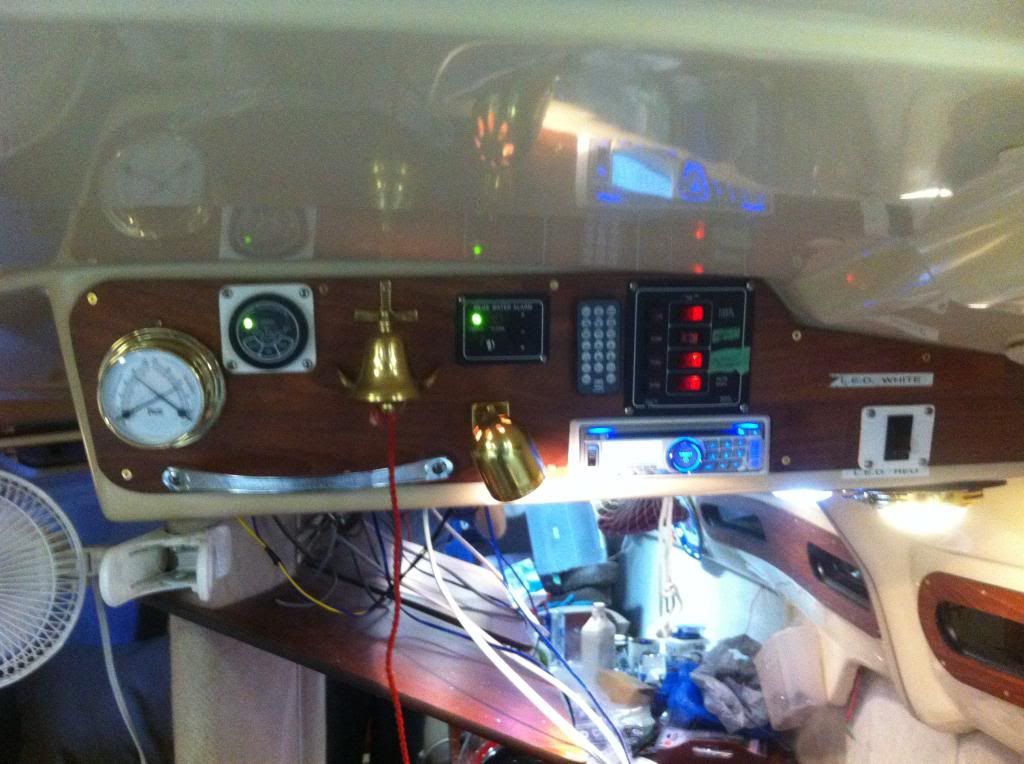
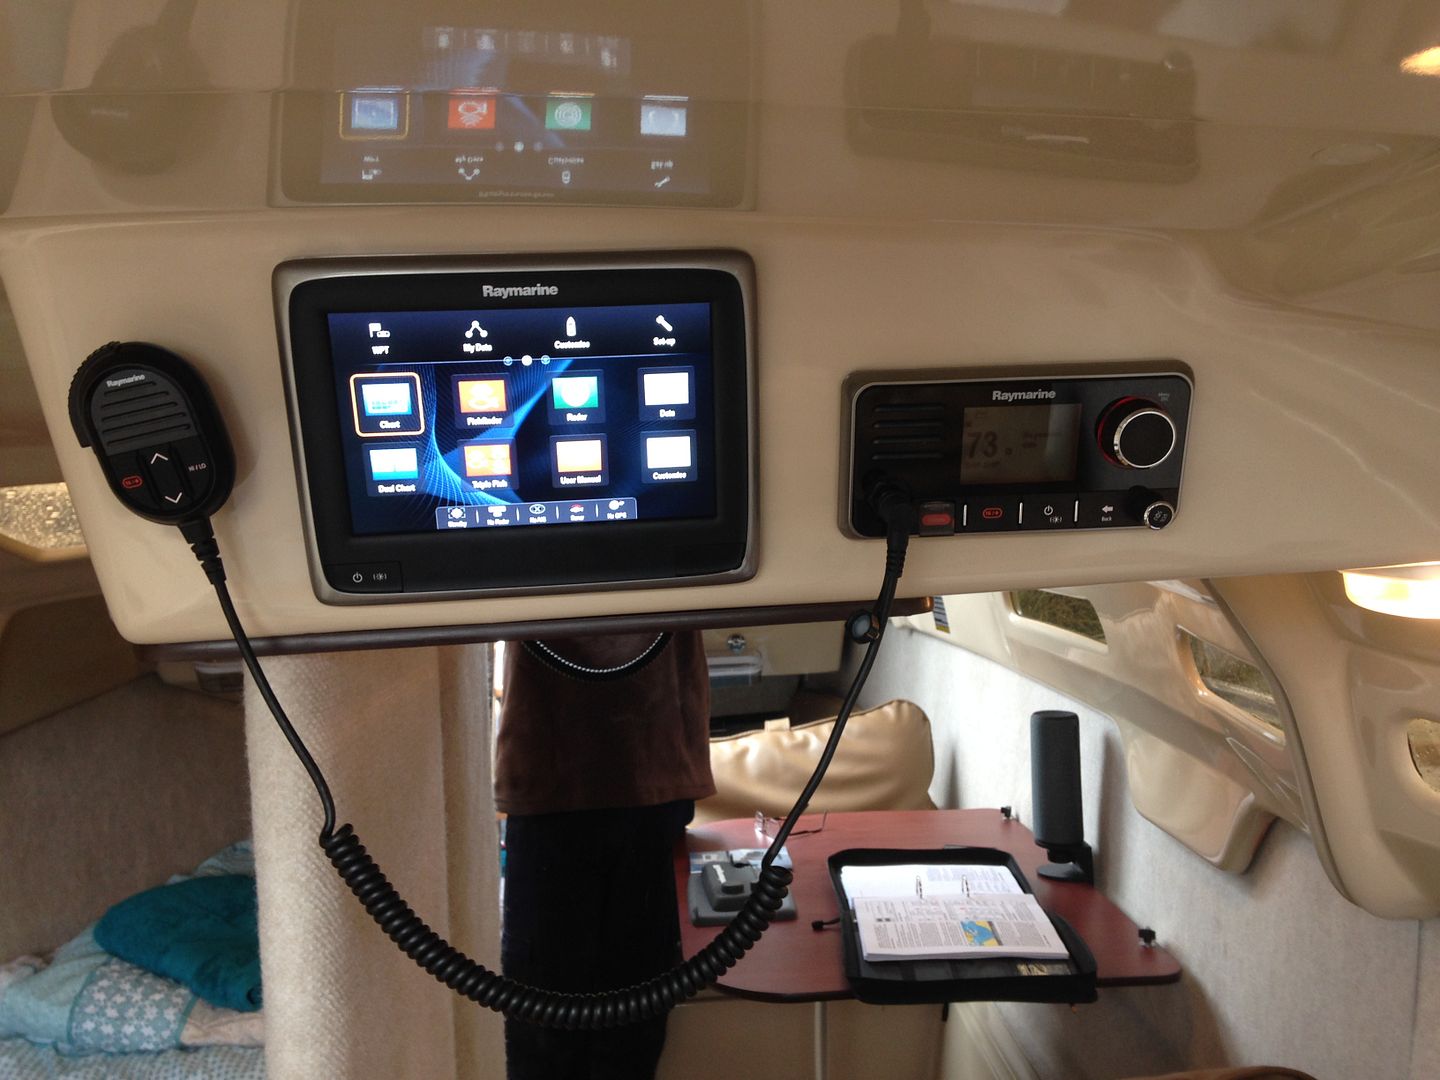
OK! First thing was to install the Raymarine a98 9" MFD and the Ray 60 VHF. I chose to install this out of the weather, located inside on the space above the large mirror.
I then started to run the backbone cables to all the places where I was going to mount Raymarine equipment. This was easier said than done, trying to run cables in a boat that has already been built. My son asked how I was going to install the cables and I said I would use a snake but you have to catch one first. I just got the "Yeah right DAD". All the DC cabling was installed at the same time. This included supplies for the USB ports throughout the boat and to supply power to all the navionics inside the boat and at the helm.
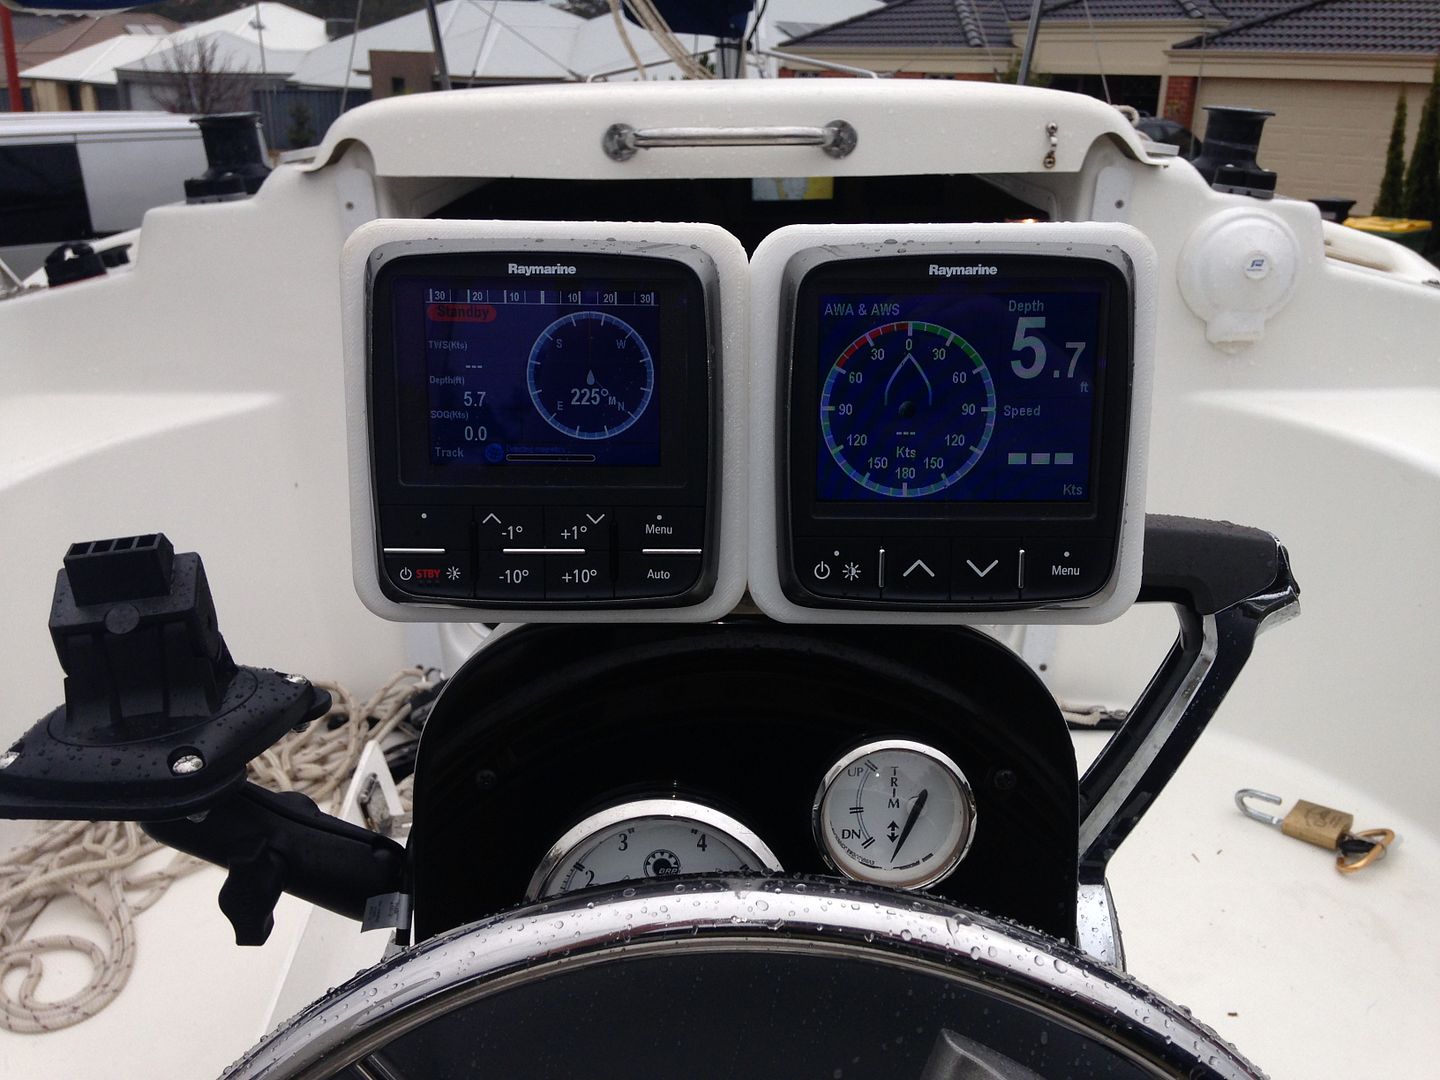
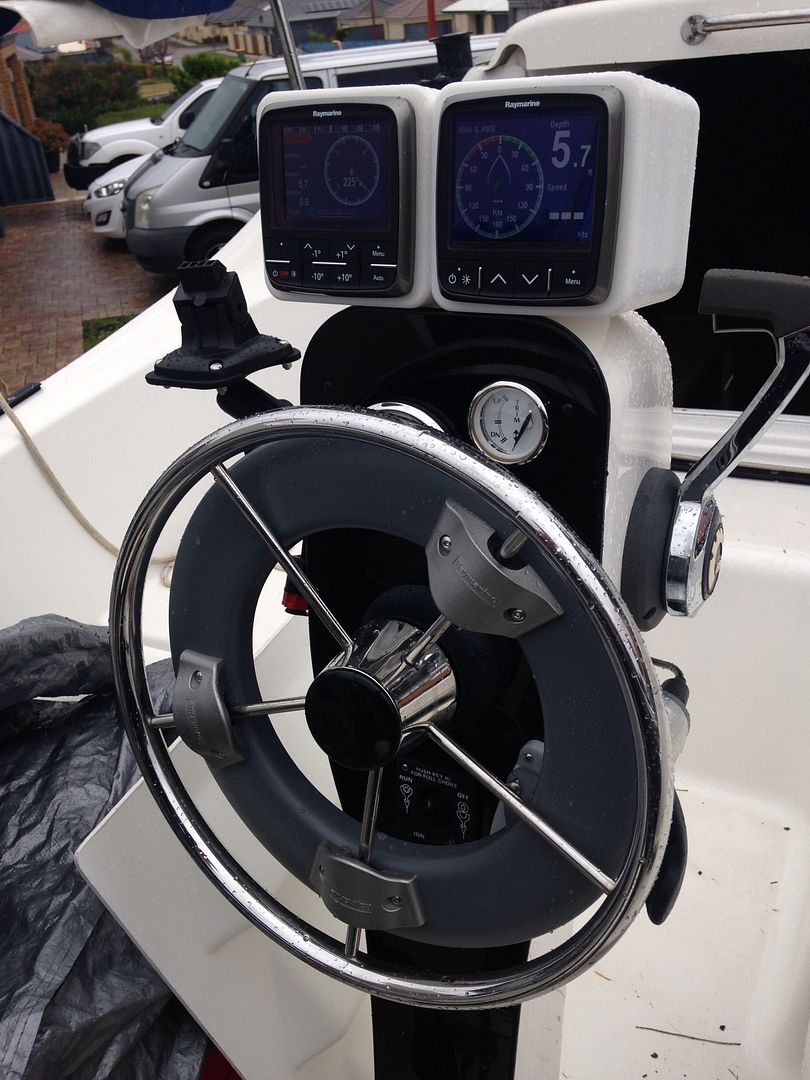
You will also see the ST4000 Wheel drive which hooks into the ACU-100 Auto Pilot. The mount on the left hand side is for the Lowrance Hook 4 chart-plotter. This is an independent backup to the Raymarine system. The gauges are the P70 auto pilot controller and the i70 multi display. The gauges are mounted into a 3D printed ABS housing.
More soon
kcmj Keith
Re: Complete Raymarine System Installation into a 2010 26M
Posted: Sat Aug 27, 2016 1:47 am
by kcmj
Flightfollowing wrote:One idea that I like was installing the p70 autopilot head and mfd together on top of the pedestal on a rotatable panel. This allows the helmsman to easily control and interact with the autopilot from either the helm seat as usual, or rotating the whole pedestal top panel to the side or even partially forward so that the helmsman can sit right next to the companionway tucked under the dodger to avoid spray, and still control everything from either position. Works very well. One side benefit is that you don't have to make a permanent cutout for the electronics in a pristine boat, you can change you mind and move the electronics or upgrade them in the future without having to patch a big pair of flush mount holes. Also, if you are spending a bunch of money on the electronics, the lowance fuel totalizer for about $200 is a nice add on for managing fuel and integrates perfectly with the raymarine mfd depending upon how you have your fuel tanks set up and how you use the boat.
Thanks for the info on the lowrance fuel transducer. I will look into those. I ended up installing the Raymarine a98 MFD. I installed it inside the boat because the MFD has its own WiFi network. This means you can keep the MFD safe and protected inside and control the boat using your phone or a tablet. This works as a synchronized display system. The only thing you cannot control from your phone or tablet is the activation of the auto pilot. This is done at the MFD inside the boat or at the helm using the P70 controller.
Re: Complete Raymarine System Installation into a 2010 26M
Posted: Sat Aug 27, 2016 1:57 am
by kcmj
Highlander wrote:If u r thinking of flush mounting electronics inside this bulkhead u should know that it can get extremely hot in there which is not good for them
So I installed four S/S 4" vents in there to ventilate the heat out of there I installed 2 into the mirror above the D/B trunk as exit vents
Installed the other 2 underneath the bulkhead above the front dinette seat as entry vents this allows the heat to flow out as it is now no longer trapped in there , on really hot days it can get extremely hot in there without vents
I discovered how really hot it got in there one hot day I opened up the front panel of my bulkhead to add more wiring for my blue led spreader lights & said to myself this cannot be good for my electronics so install the vents which I had bought to use on my
but never did so it was an even cheaper Mod lol
J
Thanks for the tip Highlander. I live in Western Australia and it gets bloody hot here. My MFD and VHF radio are mounted in this spot so this is a mod I will be doing.
kcmj Keith
Re: Complete Raymarine System Installation into a 2010 26M
Posted: Sun Sep 04, 2016 7:01 am
by DamienCh
kcmj wrote: The gauges are mounted into a 3D printed ABS housing.
Hi kcmj,
Great job with the 3D printed housing. It's exactly what I planned to do!
Yould you mind sharing the sources? STL file?
Thanks

Re: Complete Raymarine System Installation into a 2010 26M
Posted: Wed Dec 14, 2016 1:14 pm
by dbryceking
KCMJ.... Its been a few years since you did the mod. I am thinking about doing something similar with my 26M. I think the I am set with the A98 and a P70R for the autopilot also but am trying to figure out where I want to place it in the boat. How has it worked out for you having it mounted in the Cabin? Do you find it useful being in the cabin. Having to do it all over again would you still place the A98 in the cabin and keep the P70 and i70 up by the helm? Thanks!
Re: Complete Raymarine System Installation into a 2010 26M
Posted: Wed Dec 14, 2016 4:01 pm
by jimmy alonso
I mounted a Raymarine eS78 which has a 7 inch screen size. 9 inch may look too big mounted there on the small 2004 26
Helm
Mounted it so I can swivel and see while sitting on either side of the cockpit.
A plus is with the eS78 I was able to upgrade the software/firmware on the autopilot and P70.
Currently trying to get NMEA 2000 data from a Yamaha 2006 F50 through a Raymarine ECI-100 to show up on the eS78.
After that works or I give up

I'm saving my West Marine points for a Wind Tranducer and a I60 display... then a AIS...radar...


View from the side. P70 location too.

Turned for side viewing had to mount up far enough to be able to rotate the MFD completely.

Re: Complete Raymarine System Installation into a 2010 26M
Posted: Wed Dec 14, 2016 4:49 pm
by BOAT
Most of the Garmin chartplotters can create their own wi fi network - you don't need to add more multiple screens to get larger images or buy additional heads to add multiple screens anymore - with the chartplotter on it's own wi fi network you just use the chartplotter from any ipad, cell phone, or computer that has a password to the network. It works well on android tablets too. The Garmin chartplotter has a video in port too so you can also attach mast top cameras and vew them on your chartplotter too.
One ipad can display all the screens and devices your system has all on one portable display - no wires at all. Latest technology has sort of eliminated the need to purchase multiple heads and screens.
https://vimeo.com/176998271

Things sure are changing fast!


