I finally took the Plunge- New X Head Phase I
Posted: Sun Dec 23, 2007 3:03 pm
After despising the head and porta potty for the last 4 years, I decided to give the head a permanent toilet. After reviewing the options, I decided on the SEALAND Traveler with the attached 9 gallon holding tank and the new white finish. I also purchased a Jabsco Macerator and a stainless steel waste fill with flip up handle on the cap. We have never used the sink in the head and I have always seen it as an unnecessary luxury and a waste of space. I also found foot space lacking and the area cramped in general.
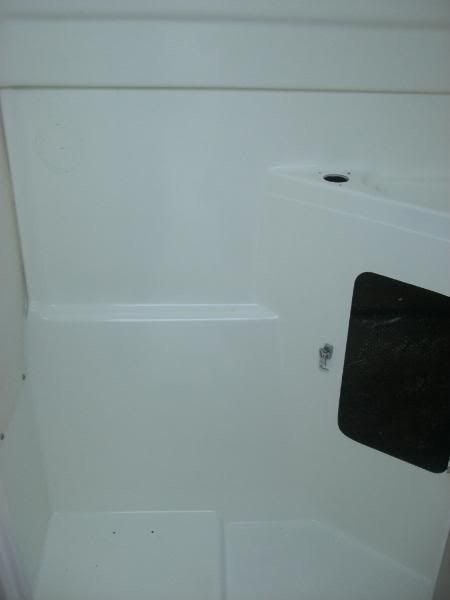
First I set the new toilet facing rearward and wasn’t too happy about having less foot room. After much contemplation, I decided to cut out the old sink assembly.

I am very pleased with the results so far.
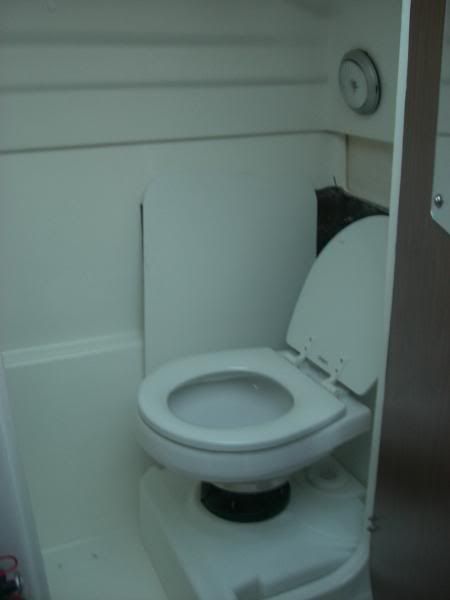
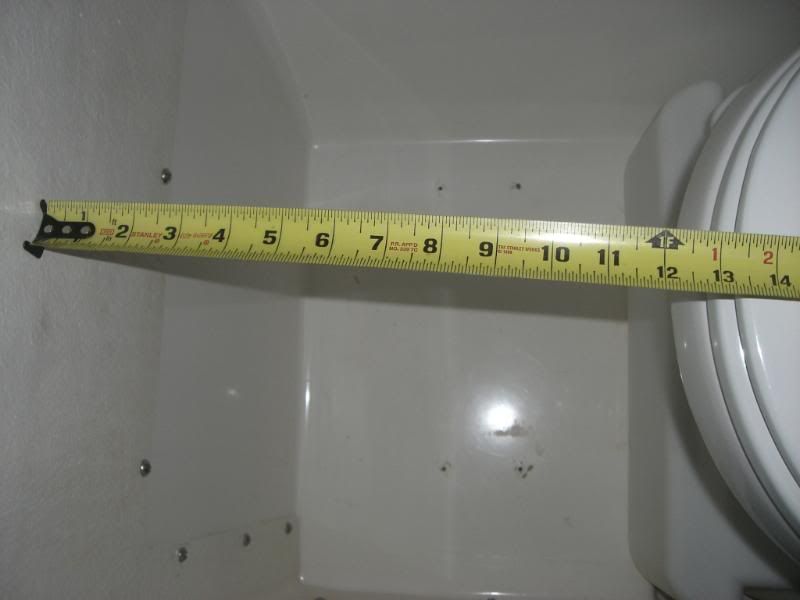
There is much more foot space available now.

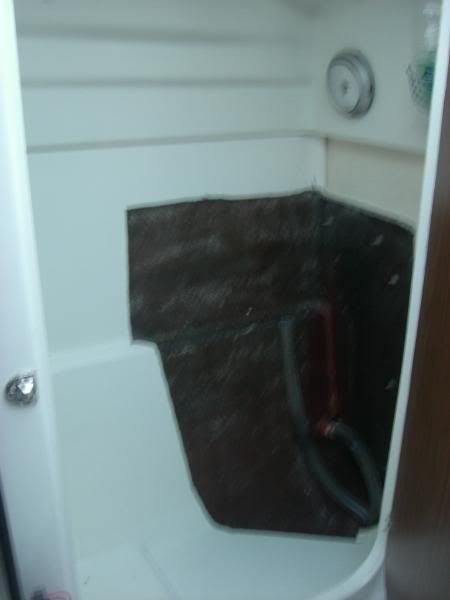
There is plenty space behind the assembly to hide all the plumbing and looks like there will be enough room for fender storage.


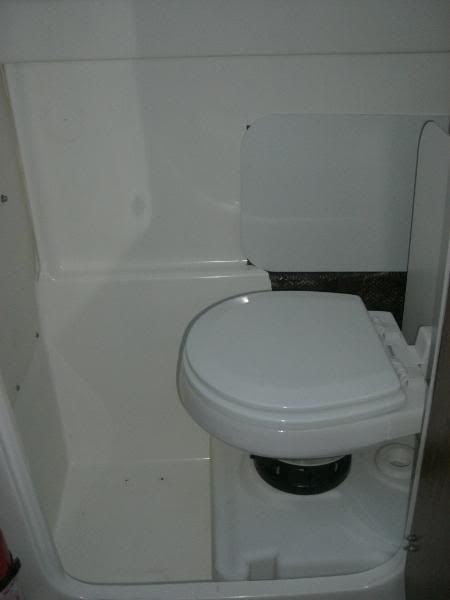
I plan on installing a cabinet in the upper aft area to hold toilet supplies. A wipes canister fits perfectly in the corner for hand sanitizing. Getting in and out of the head now is easier and since you’re facing forward there’s a view out the window. I like it so much I may even install a magazine rack and rename it the library!
For finishing the area, I purchased a shower surround from Home Depot which molds to the shape well, but the color is slightly different from the gel coat. I also have some lightweight ½” plastic panels that are a closer color match, but I would like to find the ¼” plastic material the factory used to cover the interior storage area in my 2002 X (shown in picture). It is rigid enough and is a good match to the gel coat.
Right now I am planning on installing a shutoff valve on the existing through hull and plumbing the macerator to that. I haven’t heard of any leaks or problems with the thru hulls but will add a few extra layers of glass for reinforcement.
I can install a lock on the shutoff valve in compliance with regulations. The macerator will be tee’d to the waste pump-out pipe but mounted above it so I won’t need a 3 way valve. The plumbing will be rigid schedule 40 PVC with a short piece of flex pipe to adapt the macerator to the PVC. The area behind the toilet will be covered and have 2 doors for access and storage. The area below the plumbing and macerator will be tubbed for containment in case of a leak.
We use the boat as a camper occasionally so I want the option of draining the tank at campgrounds. I can install enough wire so I can stand outside and hit a remote starter type switch to engage the macerator. A garden hose fits snugly inside the through hull so I’m hoping I can hold the hose in place and engage the macerator to drain the tank. I should have the admiral standby with the camera in case there is a “RV” type event.
I would like some feedback and opinions:
1. Would anyone know the name of the ¼” plastic panel material and where to find it? There is a Piedmont Plastics (not convenient) in the DC area, but I’m not sure what type to ask for.
2. I have a full enclosure so any horizontal surface is out for the deck fitting installation. The location I am considering is directly above the head through hull and below the black stripe (below the rub rail). That will allow a short pipe run and all plumbing will be concealed. I will be able to clip a lanyard or cable to the cap so it won’t be lost in the drink. Any thoughts on drawbacks to this arrangement?
I haven’t used a pump out on a boat with an installed system so I am wondering if the vertical location may pose any problems for access (such as height) from the dock. A guy at BOATUS told me most of the pump outs on the Bay don’t use screw in fittings, but use a donut type affair and needs to be held in manually with pressure to get a good seal. I’m thinking the vertical mount will work out better if a leak does occur- just hose the side off.
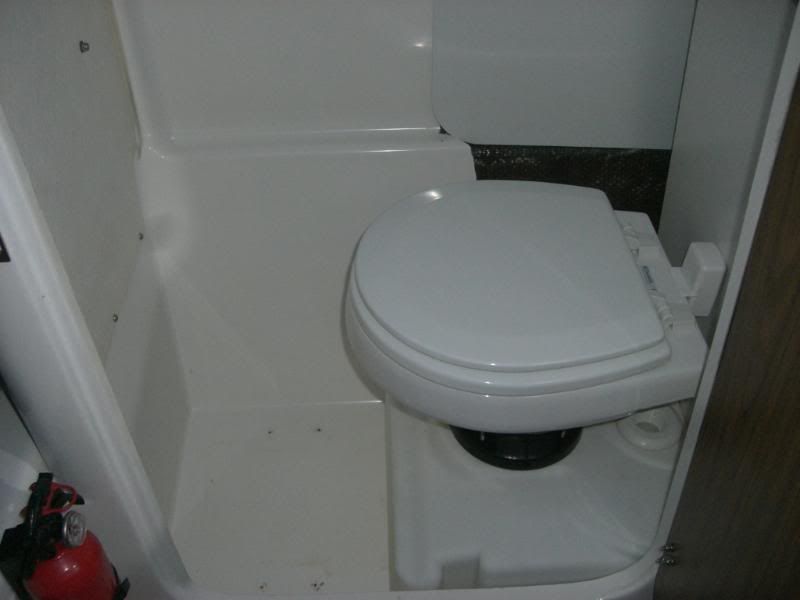
First I set the new toilet facing rearward and wasn’t too happy about having less foot room. After much contemplation, I decided to cut out the old sink assembly.
I am very pleased with the results so far.
There is much more foot space available now.
There is plenty space behind the assembly to hide all the plumbing and looks like there will be enough room for fender storage.
I plan on installing a cabinet in the upper aft area to hold toilet supplies. A wipes canister fits perfectly in the corner for hand sanitizing. Getting in and out of the head now is easier and since you’re facing forward there’s a view out the window. I like it so much I may even install a magazine rack and rename it the library!
For finishing the area, I purchased a shower surround from Home Depot which molds to the shape well, but the color is slightly different from the gel coat. I also have some lightweight ½” plastic panels that are a closer color match, but I would like to find the ¼” plastic material the factory used to cover the interior storage area in my 2002 X (shown in picture). It is rigid enough and is a good match to the gel coat.
Right now I am planning on installing a shutoff valve on the existing through hull and plumbing the macerator to that. I haven’t heard of any leaks or problems with the thru hulls but will add a few extra layers of glass for reinforcement.
I can install a lock on the shutoff valve in compliance with regulations. The macerator will be tee’d to the waste pump-out pipe but mounted above it so I won’t need a 3 way valve. The plumbing will be rigid schedule 40 PVC with a short piece of flex pipe to adapt the macerator to the PVC. The area behind the toilet will be covered and have 2 doors for access and storage. The area below the plumbing and macerator will be tubbed for containment in case of a leak.
We use the boat as a camper occasionally so I want the option of draining the tank at campgrounds. I can install enough wire so I can stand outside and hit a remote starter type switch to engage the macerator. A garden hose fits snugly inside the through hull so I’m hoping I can hold the hose in place and engage the macerator to drain the tank. I should have the admiral standby with the camera in case there is a “RV” type event.
I would like some feedback and opinions:
1. Would anyone know the name of the ¼” plastic panel material and where to find it? There is a Piedmont Plastics (not convenient) in the DC area, but I’m not sure what type to ask for.
2. I have a full enclosure so any horizontal surface is out for the deck fitting installation. The location I am considering is directly above the head through hull and below the black stripe (below the rub rail). That will allow a short pipe run and all plumbing will be concealed. I will be able to clip a lanyard or cable to the cap so it won’t be lost in the drink. Any thoughts on drawbacks to this arrangement?
I haven’t used a pump out on a boat with an installed system so I am wondering if the vertical location may pose any problems for access (such as height) from the dock. A guy at BOATUS told me most of the pump outs on the Bay don’t use screw in fittings, but use a donut type affair and needs to be held in manually with pressure to get a good seal. I’m thinking the vertical mount will work out better if a leak does occur- just hose the side off.