


Main halyard
Vang
Outhaul (8 power)
Single line reefing x 2 (one for each reef point)
Topping lift
Ballasted keel (6:1 purchase system)
Furler
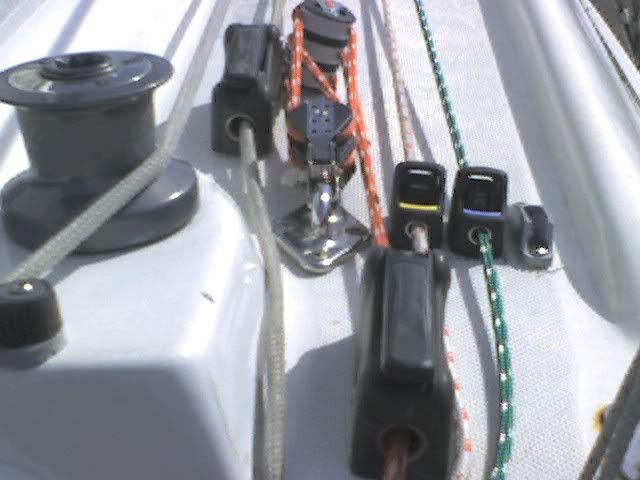
Starboard clutches holding the main halyard (gray line,) keel (red line,) outhaoul (green line,) and vang (white line with red speckles)
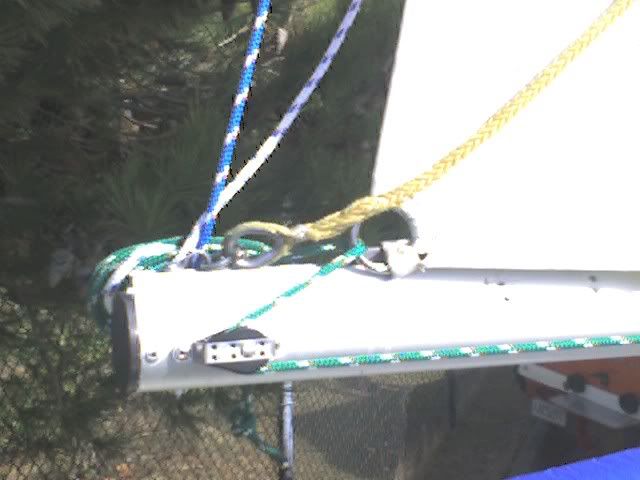
Tripple block used to route the lines. They do cross over the front of the jib tracks, making the first hole unusable. No biggie (IMHO)
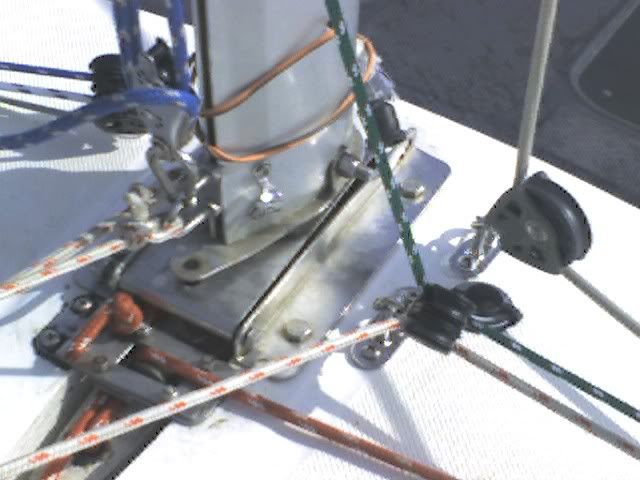
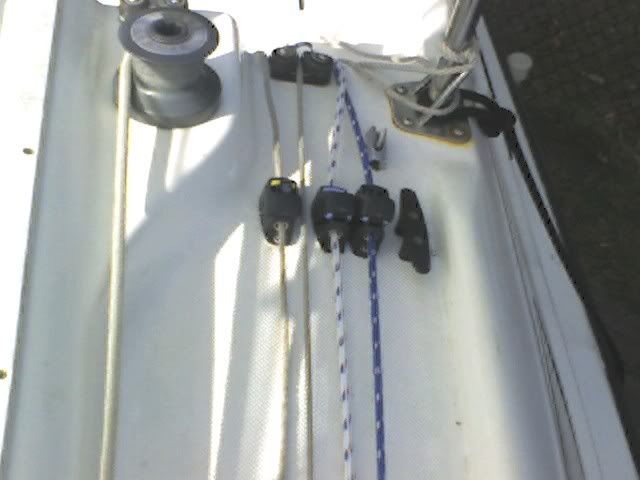
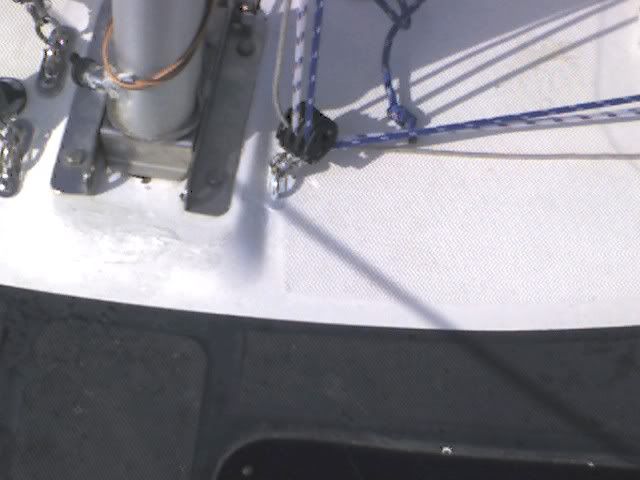
This is hwere the blocks are mounted at the mast base. Swive blocks are attached to deck-bolted padeyes. The single block is for the halyard. The double is for the outhaul and vang.
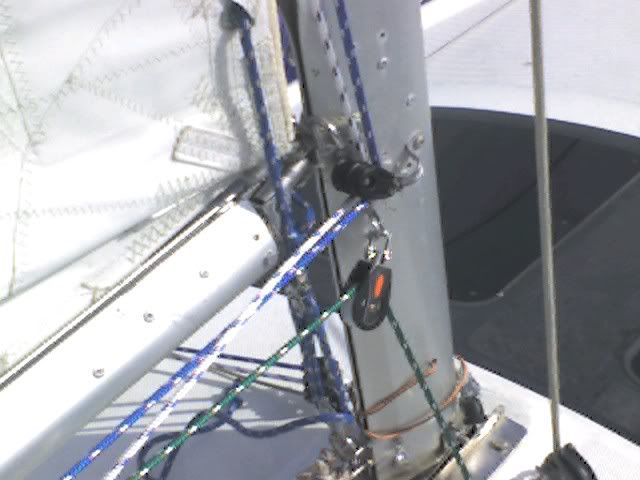
Here is where the lines are routed to feed back to the boom (single block) for the outhaul, and up to the sail reef tacks (double block)
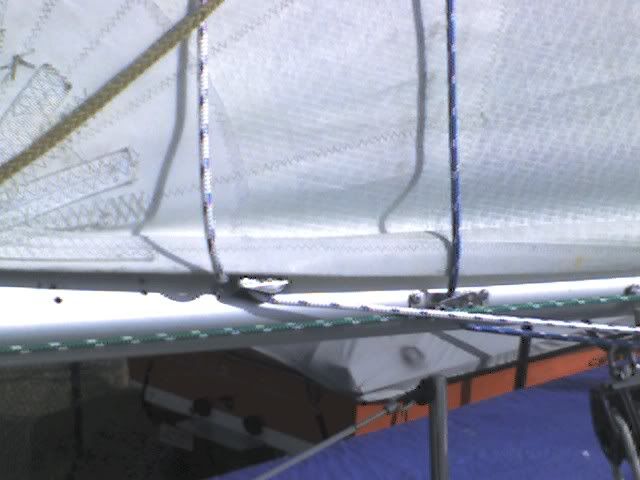
Boom, starboard side where you can see the reefing lines feed through their respective blocks and up to the reef clews. The outhaul line has a 4:1 block and tackle system X2 with the 2:1 purchase through the clew giving a powerful outhaoul controlled right from the cockpit.
This is the boom's end, starboard side. Here you can see the outhaul block and a horn cleat on the port side. Outhaul and all three reef lines are tied to the port horn cleat.
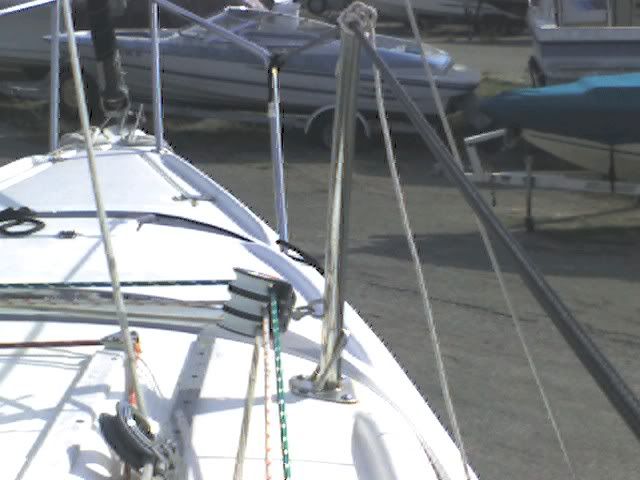
Port side clutches used for the topping lift, reef lines, and furling line
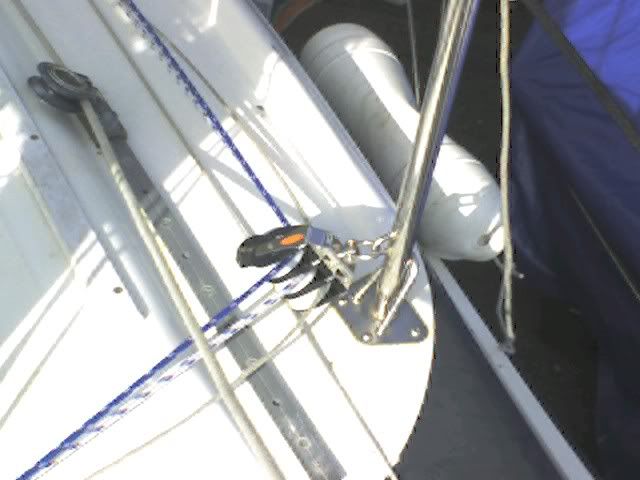
Turning block on the port side
Here is the base of the mast on the port side. The tripple block feeds the two reefing lines and the topping lift.
The picture of the vang didn't come out, but basically it is a split 2:1 x2 with one end of the second 2:1 tied to an eyestrap on the mast, port side and the starboard end feeding through the deck mounted block, throug the tripple block at the stanchion and aft to the clutch.
Fair Winds,
Leon


