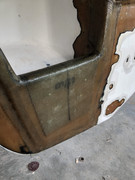
I thought I would start a thread on refitting my 1988/89. This all started because I wanted to change out the rub rail, and it has opened a can of worms. Well not really, it opened my desire to fit the boat properly for our needs. So right now I am starting in the lazarette. The trim of the motor well had cracked and someone fiberglassed over it haphazardly. When I pulled it off there were gaps between the deck and hull joint. This was filled with structural repair putty. The inside a fillet was added with the structural putty and then tape placed and tabbed in. Because I have a tohatsu 9.8 I wanted to beef up the entire transom. On the outside of the motor well I have three layers of 1708 over the cap area and two layers down the transom area where my motor bracket will mount. On the inside the motor mount area has two layers of 1708 glassed in place. On the starboard side of the transom I bedded in place some 3/4" plywood. I plan on adding a swim platform ladder and wanted something more substantial than the stock transom. The plywood edges were rounded over with a router and then fillets of the structural putty was applied and then tabbed over with 6" tape. Then a layer of 1708 was placed over the entire section. I laid up a double layer of 1708 on a flat surface to build a fiberglass panel to use as a blank. This bank was shaped to fill the coaming area of the front wall in the lazarette that separates the laz from the cabin. These pieces were bedded in repair putty, fillets added and then tabbed in place. The front wall also needed to be tabbed, so fillets were added and the entire perimeter was tabbed in place with 6" tape. Other plans for the laz include gel coating, adding a permanent fuel tank- which will have the proper ventilation both for the tank and locker. All bolts through the transom will be drilled oversized, filled with filler and then drilled to proper size.
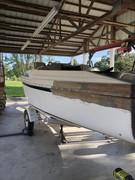
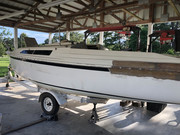
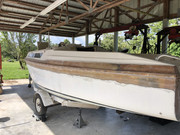
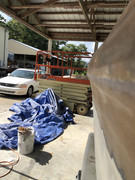
Its been a week of rain, so I cleared out the carport completely of the vehicles, put the trailer tires on skates and now the 26D is completely out of the weather, from overhead at least. Moisture can still blow in from the sides but she is now centered under a 24x32 roof at least. Todays goal was to use structural repair putty in the deck / hull seam. Things didn't go as planned. I tried to reuse the old fillips head machine screws but couldn't apply enough torque with out the bit stripping out. Also I have barely enough room between the deck liner and hull liner to get my oversized hand in there to put a washer and nut on. In some places the hull had closed up leaving a gap wider than the machine bolts I had. So I have ordered fully threaded hex bolts to be able to apply a good amount of torque to close the gap and set it in place with the structural repair putty. Then I will remove the bolts again, fiberglass over the joint with 2 layers of 1708. Redrill and counter sink the holes. Insert flat head machine screws bedded with butyl and torque them down. Its a lot of work but it should outlast me.
Also my 11 gal Moeller Marine fuel tank came in today. Its a perfect fit for what I need. My 9.8 should only use 1GPH so this size should do nicely.
I am able to pry this apart to get my fingers in there to work but if it slams slut...
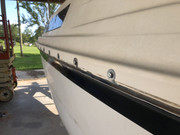
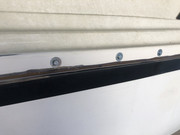
Got the proper bolts at the end of last week, but working nights kept me from the boat until today. After a nap this morning we were able to get all the bolts in place and somehow get the washers and nuts on the back side. I have no idea how they did this from the factory. I had to cut off at least an inch of the deck liner where it meets the hull liner just to be able to squeeze my hand in there to get the nuts fastened. After this we made sure each bolt was loose so I was able to pipe in the polyester structural repair putty, also meant for bonding. Once this was between the deck and hull, each bolt was tightened and we got squeeze out bout inside and outside. Used a squeegee with a radiuses corner to give us a nice little fillet on the outside. The squeeze out inside we just left in place as it will never been seen unless you are looking for it. I had previously ground back the gelcoat on the sport stern last week when we did this same procedure to the lazarette. The putty should cure overnight, if not already and tomorrow we will remove the bolts and finish grinding back the gelcoat in preparation of laying glass over the seam. I plan on two layers of 1708, 8" and 6" wide. This will be done with epoxy and then faired. After which the bolts holes will be redrilled and countersunk for phillips flat head machine screws. These will be set with sealant to prevent any leaks. Then repeat on the other side.
So many bolts. The original machine screws had to come off, then hex bolts put on and back off and finished with new machine screws. SO MANY BOLTS!
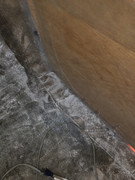
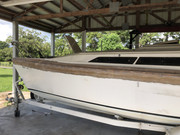
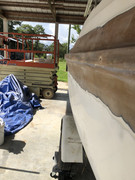
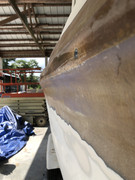
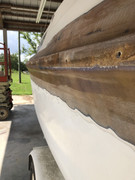
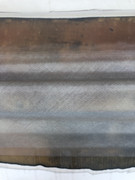
The structural repair putty cured nice and hard. We removed the bolts and the seam held. Not that I was expecting a catastrophic failure but with me you never know. After removing the bolts a 5-6" section of the gelcoat was removed down to sound fiberglass. "OH Glorious Sanding". This by far has been the hardest part yet. It took me about 4hrs to grind this paint and gelcoat back.
There was still a "lip" where the deck overlapped the hull. This "lip" was filled with the structural repair putty to create a filet in preparation for laying the glass over. This was about the time my back gave out and I was done for the day. So I let it cure overnight and gave it sanding this morning. I tried to round everything much as possible.
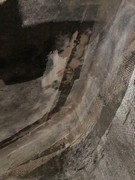
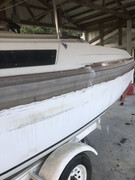
The area was wiped down again and a second coat of the structural repair putty was applied and the entire seam faired a bit more.
Next it will get sanded down and smoothed out for laying the fiberglass. I thought I had ordered some peel ply but accidentally ordered vacuum bagging plastic. Peel ply should be here today and if the weather holds out we should be laying up the fiberglass on Saturday.
After mulling it over in my head I am on the fence on how to layup the fiberglass. I originally planned to hand layup with peel ply but I am wondering if I should go the extra steps and vacuum bag it instead?
edit: after thinking about it overnight I realized I can't vacuum bag since I still have the bolt holes open. These open holes would never allow a vacuum. So wet hand lay up with peel ply it is.
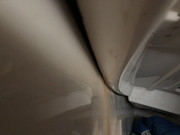
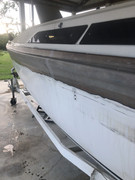
Port side is glassed in place. 2 layers fo 1708 tape, 8"& 6". The 8" took the curves great. The 6" finally laid down once fully wet but it was a fight. It is two continuous pieces of 1708 from bow to stern. Laying each piece as a continuous strip had much to do with the mess made. I felt like on continuous piece would be stronger than multiple small sections. Peel ply placed over the top. It all went well enough. I was a bit stressed working with the epoxy in the heat. I was afraid it would kick off to early but it didn't. I wished I had put down a drop cloth because now I have clean up on both the hull sides and carport floor. It was a bit messier than I was expecting. But all things considered I think it went very well and at this point I am pleased. Still a ways to go but this first hurdle has me feeling good about the rest.
kenfyoozed wrote: ↑Mon Jul 18, 2022 4:18 pm
I plan on two layers of 1708, 8" and 6" wide. This will be done with epoxy and then faired. After which the bolts holes will be redrilled and countersunk for phillips flat head machine screws. These will be set with sealant to prevent any leaks. Then repeat on the other side.
So many bolts. The original machine screws had to come off, then hex bolts put on and back off and finished with new machine screws. SO MANY BOLTS!
I can’t recall if you covered this in the other thread, but do you think you absolutely need the final machine screws? So many bolts means so many holes, each of which is a potential leak down the road. With the structural filler and the 1708 (especially with epoxy), I’d bet the joint will already be stronger than than the original. Solid glass will never leak (well, unless you crash into something).
I have gone back and forth on this thought. Do I believe it needs the machine screws? Not really. I think it should be fine as is, BUT if my work is not good enough ( which I feel it is good enough) and the seam opens up, having the machine screws in place would keep a catastrophic failure from happening. Now the bigger issue is the rubrail, which is what started all this....
The plan as of now is to reinsert the machine screws every 6 inches, and then apply the rub rail over the machine screws. The rub rail would be installed will pan head screws every 6" between the machine screws which would give a fastener every 3"...... adding to the possibility of even more leaks. Of course the rub rail will be bedded in a sealant. If a machine screw were to start leaking the only way to fix it would mean removing the entire section of rub rail, 6' sections, to gain access.
Another option would be to use longer machine screws and bolt through the rub rail and hull side all in one go. Again the rail itself would be bedded in a sealant. Then each machine screw would be set in sealant as well. I think this is the wiser route...BUT to do this either I have match the screws holes in the rub rail to the existing holes OR drill all new holes, which would be easier.
I have time to decide what I am going to do. I am definitely going to put fasteners back in. I am leaning to drilling new holes and running the machine screws through the rub rail. That way I can make sure the holes in the hull and rail line up properly.
Any thoughts and suggestions are appreciated, because Im sure there is something I have missed.
I would guess the risk of leaks is probably about the same either way, because with the inner and outer sets of screws method, the heads of the inner set will be completely covered over with sealant/rubrail. The only way those are going to leak is if you have already broken that seal, which probably means the outer screws are already leaking. I don’t think I have any better suggestions.
You have gained the advantage that you aren’t trying to seal the huge joint gap, the glass is taking care of that. Any leaks in the future will just be a matter of rebedding hardware. So much easier than trying to clean out and rebed a deck/hull joint.
One option is to sort of hybridize things a bit… Go with the external hardware BUT Use the thru-bolting at the regular suggested spacing and fill in with screws at the recommended spacing. Fewer thru holes and nuts…
Just a suggestion…
I do like that you are going back in with mechanical fasteners!
As good as glass and structural putty can be having through bolts adds a whole lot of pre-emotive structural joint integrity.
Generally in a perfect world the bonded joint might be sufficient but we don’t live in a perfect world and we travel on one of the least forgiving mediums for fun and enjoyment. The extra effort to install the hardware far out weighs the hassle or catastrophe of a blown unrestrained seam ( because of a missed waxy/grime layer that was hidden from view ).


 and we travel on one of the least forgiving mediums
  for fun and enjoyment. The extra effort to install the hardware far out weighs the hassle or catastrophe of a blown unrestrained seam ( because of a missed waxy/grime layer that was hidden from view ).

